
TL;DR:
- Automotive refinishing requires proper surface preparation, substrate-specific primers, controlled environments, and disciplined finishing techniques. Neglecting any of these steps leads to premature paint failure, rework, and subpar results.
Automotive refinishing essentials are the foundational tools, materials, and techniques required to achieve professional, lasting paint finishes on vehicles. The industry term for this discipline is automotive refinishing, covering everything from surface preparation through final polishing. A flawed approach at any stage produces paint that peels, flakes, or loses gloss far ahead of schedule. This guide breaks down each critical element so you can build a process that delivers factory-grade results every time.
1. What are the essential surface preparation tools and techniques?
Surface preparation is the single most important phase in any refinishing job. Preparation accounts for 80% of a superior finish, while actual paint application accounts for only 20%. That ratio should change how you allocate your time and budget on every job.
Abrasive systems form the backbone of surface prep. You work through a grit progression that matches the task at hand:
- 80–120 grit: Strip old paint, remove rust, and shape body filler
- 180–320 grit: Smooth filler work and remove deep scratches
- 400–600 grit: Final sanding before primer application
- 1500–2000+ grit: Wet sanding between coats and final refinement
Cleaning and degreasing come before and after sanding. Silicone, wax, and road film contaminate the surface at a microscopic level. Skipping proper degreasing or using the wrong cleaner causes adhesion failures that show up days after delivery. Use dedicated wax and grease removers, not household solvents.
Masking is the final prep step before primer. Precision masking tapes, foam backer rods, and plugs define your paint borders and protect trim, glass, and mechanical components. Sloppy masking creates overspray problems that cost more to fix than they saved in time.
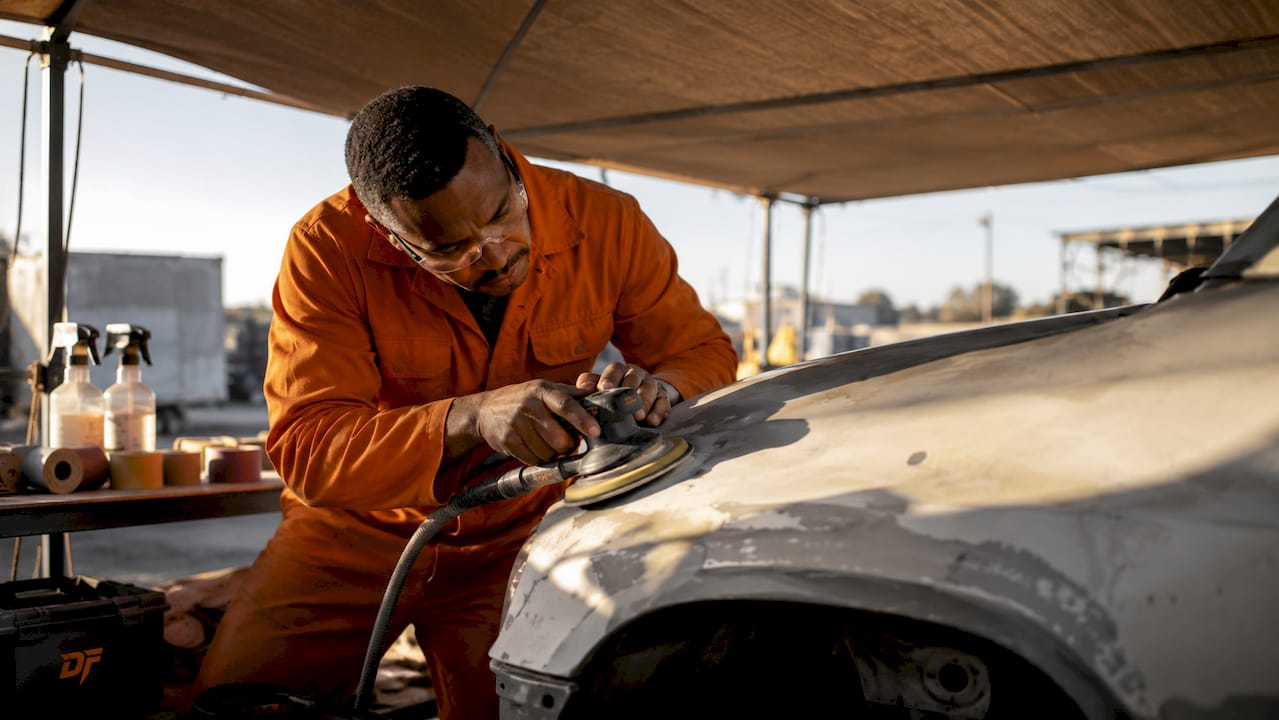
Must-have tools for surface prep include dual-action orbital sanders, sanding blocks, abrasive pads in multiple grits, tack cloths, and panel wipe solutions.
Pro Tip: Never rush the prep stage to save time. A contaminated or poorly sanded surface will cause paint failure regardless of the quality of your topcoat. The rework cost always exceeds the time saved.
2. Which primers are right for each substrate?
Primer selection is substrate-specific. Choosing the wrong primer for a given substrate causes peeling and adhesion failures that no topcoat can fix. The four primer types you need to know are:
- Etch primer: Bonds chemically to bare metal and provides corrosion resistance. Use it as the first coat on any stripped steel or aluminum panel.
- Epoxy primer: Delivers broad adhesion and chemical resistance. Works on metal, fiberglass, and previously painted surfaces. The most versatile option in a professional shop.
- Urethane high-build filler: Fills minor surface imperfections and provides a smooth base for topcoats. Apply over epoxy primer, not directly on bare metal.
- Plastic adhesion promoter: Mandatory for bumpers, fascias, and any flexible plastic component. Without it, paint will peel from plastic within weeks.
| Primer Type | Best Substrate | Primary Function |
|---|---|---|
| Etch primer | Bare metal | Corrosion resistance, chemical bond |
| Epoxy primer | Metal, fiberglass, old paint | Universal adhesion, sealing |
| Urethane high-build | Over epoxy primer | Surface filling, smoothing |
| Plastic adhesion promoter | Flexible plastics | Paint adhesion on non-porous surfaces |
Chemical compatibility between primer and topcoat is non-negotiable. Applying water-borne paint over solvent-based residues without a proper sealer causes immediate adhesion failure. Always check the technical data sheet for mixing ratios, drying times, and topcoat compatibility before you spray.
Pro Tip: Verify primer-to-topcoat compatibility before every job, not just when switching brands. Curing conditions like temperature and humidity affect adhesion as much as product choice does.
3. What spray equipment and techniques produce professional topcoats?
High-performance spray guns are the core of topcoat application. Gravity-feed HVLP (high volume, low pressure) guns deliver superior transfer efficiency and reduce overspray compared to older siphon-feed designs. You need separate guns or at minimum separate fluid tips for primers, basecoats, and clearcoats, since viscosity requirements differ significantly.
The spray booth environment controls the outcome as much as the gun does. Filtered airflow and dust-free conditions prevent microscopic particles from embedding in wet paint. Temperature and humidity inside the booth affect flash times, flow-out, and gloss levels. A booth running outside its specified temperature range produces inconsistent results even with perfect technique.
Standard topcoat application follows this sequence:
- Apply basecoat in 2–3 medium wet coats, allowing proper flash time between each
- Confirm full color coverage before moving to clearcoat
- Apply clearcoat in 2–3 coats, maintaining consistent gun distance and speed
- Allow full cure before wet sanding or polishing
Atomization, fan pattern, and gun distance work together. A fan pattern that is too narrow creates runs. A gun held too far from the panel causes dry spray and poor flow-out. Calibrate your equipment before each job, not just when problems appear.
Pro Tip: Clean your spray gun thoroughly after every use. Dried material in the fluid tip changes atomization patterns and ruins the next job. A five-minute cleaning routine protects a $500 gun and every finish you spray.
4. How do masking and environment control prevent paint defects?
Precision masking and a controlled environment are two sides of the same quality equation. Masking defines where paint goes. Environment control determines what happens to paint once it lands. Both require deliberate attention.
Masking materials for professional shops include:
- Fine-line masking tape for sharp, clean paint edges
- Foam backer rods and door jamb tape for three-dimensional masking
- Plastic sheeting and paper masking for large panel coverage
- Rubber plugs and caps for protecting threaded holes and sensors
Environment control goes beyond having a spray booth. Dust contamination causes nibs and surface imperfections that require labor-intensive rework. Multi-layer protective wall and floor films reduce dust migration from booth surfaces and extend the time between full booth cleandowns. Dustfreefilm’s electrostatic booth wall and floor protectors are designed specifically for this purpose, with a patented dispenser system that allows quick, bubble-free installation.
| Environment Factor | Impact on Finish | Control Method |
|---|---|---|
| Airborne dust | Nibs, texture defects | Filtered airflow, booth films |
| Temperature | Flash time, gloss | Climate-controlled booth |
| Humidity | Blushing, adhesion loss | Dehumidification system |
| Overspray | Contamination of wet coats | Precision masking, airflow direction |
Shops that invest in dust-free booth environments consistently report fewer defects and less rework. The time saved on corrections more than offsets the cost of quality masking materials and booth protection films.
5. What finishing and refinement steps deliver a mirror-like result?
The cut and buff phase separates a good finish from a show-quality one. Wet sanding with 2000+ grit followed by multi-stage polishing removes orange peel, light scratches, and texture left in the clearcoat. Skipping this phase leaves a finish that looks flat and amateur under direct light.
The refinement sequence works as follows:
- Wet sand with 2000 grit to level the clearcoat surface
- Follow with 3000 grit to remove the 2000-grit scratches
- Apply a cutting compound with a dual-action or rotary polisher to restore gloss
- Finish with a fine polish or glaze to maximize depth and clarity
- Apply a paint sealant or wax to protect the finished surface
Polishing compound selection matters. Heavy cutting compounds remove material fast but leave micro-scratches that require a finishing polish to correct. Using only a finishing polish on heavy orange peel wastes time and produces poor results. Match the compound to the defect level.
Technician skill and patience determine the final outcome at this stage. Rushing with a rotary polisher on thin clearcoat burns through to the basecoat. Work in sections, check your progress under a focused light source, and never polish in direct sunlight.
Pro Tip: Check your clearcoat thickness with a paint depth gauge before wet sanding. Thin clearcoat from the factory or a previous repair job leaves little margin for error. Knowing the thickness prevents costly burn-throughs.
Key takeaways
Mastering automotive refinishing requires equal investment in surface preparation, substrate-specific primers, controlled spray environments, and disciplined finishing techniques.
| Point | Details |
|---|---|
| Surface prep drives finish quality | 80% of finish quality depends on prep; never rush sanding or degreasing. |
| Match primer to substrate | Use etch primers on bare metal, epoxy for broad adhesion, and adhesion promoters on all plastics. |
| Control the spray environment | Filtered airflow and booth protection films prevent dust nibs and reduce rework. |
| Follow topcoat application steps | Layer basecoat and clearcoat with correct flash times to avoid runs, sags, and adhesion failures. |
| Complete the cut and buff phase | Wet sanding and multi-stage polishing are required for a mirror-like, professional finish. |
What I’ve learned after years in the refinishing world
The biggest mistake I see professionals make is treating surface prep as a formality. They have the right gun, the right paint, and a decent booth, but they rush the sanding and skip a proper degreasing step. The result is a beautiful finish that starts lifting at the edges within a month. No topcoat compensates for a contaminated substrate.
My second observation is about primer selection. Shops that stock only one primer type spend more time troubleshooting adhesion failures than shops that maintain a proper primer inventory. The cost difference between an etch primer and an epoxy primer is negligible compared to the cost of a redo. Substrate-specific priming is not a luxury. It is the baseline for professional work.
On environment control, I have seen shops spend heavily on premium paint and then spray in a booth with dirty wall filters and no floor protection. Dust barriers in the booth are as important as the paint chemistry. A clean environment does not happen by accident. It requires booth films, filtered airflow, and a consistent cleaning protocol.
Finally, invest in your own refinishing safety practices. Proper PPE, including a supplied-air respirator, chemical-resistant gloves, and eye protection, is not optional. The solvents and isocyanates in modern clearcoats carry real long-term health risks. Protecting your health protects your career.
— Dust
How Dustfreefilm supports professional refinishing quality
Clean booths produce clean finishes. Dustfreefilm has manufactured premium spray booth protection films since 2012, specifically for auto body shops and industrial painting facilities that cannot afford dust contamination in their work.
Dustfreefilm’s multi-layer electrostatic wall and floor protectors peel away one layer at a time, keeping booth surfaces clean between jobs without a full teardown. The patented dispenser system installs quickly and without bubbles, so your team spends time painting, not cleaning. Products meet European manufacturing standards and are available in custom configurations for high-volume operations. Visit Dustfreefilm’s spray booth protection page to see the full product range, or request a quote for your shop’s specific setup.
FAQ
What does surface preparation include in automotive refinishing?
Surface preparation includes sanding with graded abrasives, degreasing with wax and grease removers, applying masking materials, and ensuring the substrate is clean and free of contamination before primer application.
Which primer should I use on bare metal?
Etch primer is the correct choice for bare metal. It bonds chemically to the surface and provides corrosion resistance as the first layer in the coating system.
Why does dust contamination matter so much in spray booths?
Dust causes nibs and texture defects in wet paint that require labor-intensive rework. Multi-layer booth protection films and filtered airflow are the most effective controls.
What is the cut and buff process in automotive refinishing?
The cut and buff process uses wet sanding at 2000+ grit followed by polishing compounds to remove orange peel and surface texture from the clearcoat, producing a mirror-like finish.
How do I prevent paint peeling after a refinishing job?
Proper surface prep and substrate-specific primer selection prevent peeling. Incompatible product layering and skipped degreasing steps are the two most common causes of early paint failure.