

TL;DR:
- Proper booth surface preparation involves a structured, top-to-bottom cleaning process using the right tools and safety gear. Following disciplined procedures reduces contamination, minimizes paint defects, and improves finish quality in industrial and automotive settings. Applying protective films promptly after cleaning further maintains surface cleanliness and enhances overall coating outcomes.
Booth surface preparation is the systematic sequence of safety checks, cleaning steps, and inspections that removes contaminants from spray booth surfaces before any paint is applied. Professionals in automotive refinishing and industrial coating operations rely on a disciplined process for booth surface prep to prevent defects like fish-eyes, poor adhesion, and paint inclusions. The industry standard approach covers everything from personal protective equipment selection to filter replacement and final lighting inspections. Dustfreefilm has worked with auto body shops and industrial facilities since 2012, and the pattern is consistent: shops that follow a structured preparation protocol produce measurably better finishes with fewer rework cycles.
What tools and safety gear are necessary for effective booth surface prep?
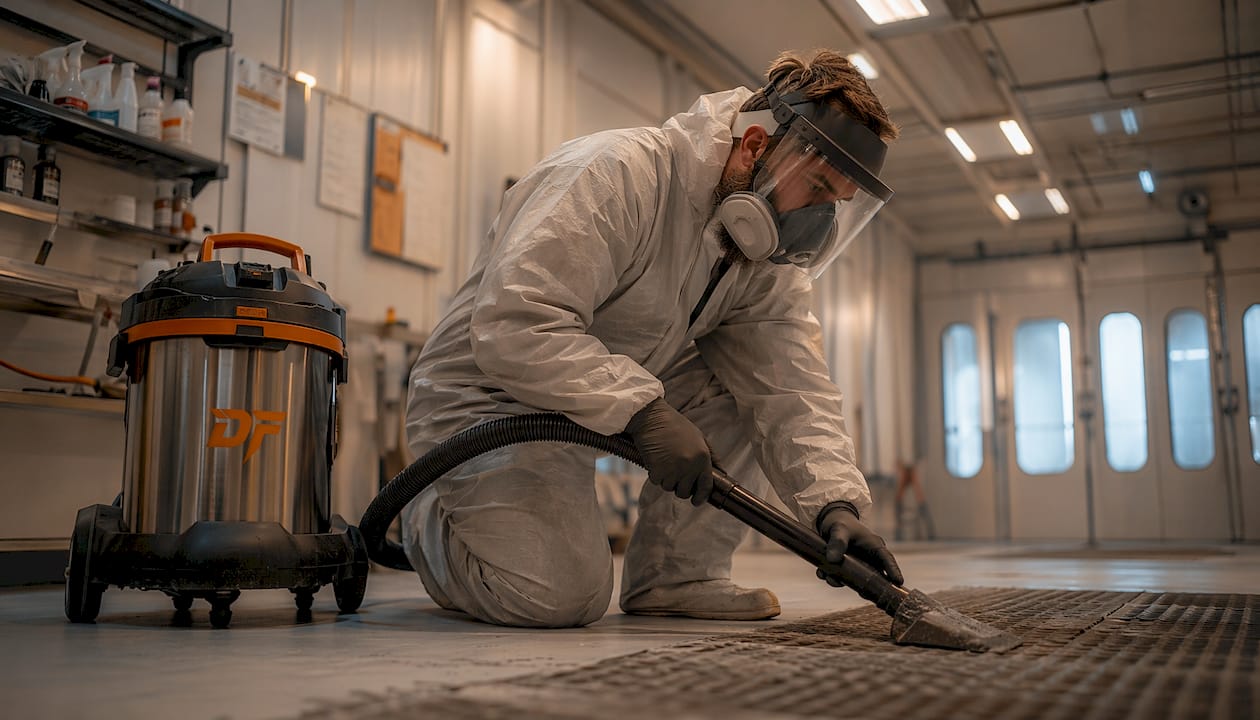
The right tools determine whether a cleaning session removes contamination or simply moves it around. A professional spray booth deep clean requires at least eight distinct steps, each tied to a specific tool or piece of safety equipment. Choosing the wrong tool at any stage risks reintroducing the very particles you are trying to eliminate.
Cleaning tools you need:
- Soft bristle broom: Sweeps walls and ceilings without scratching surfaces or generating static charges that attract dust
- Stiff floor brush: Dislodges dried overspray and embedded debris from textured floor surfaces
- Wet/dry vacuum: Pulls fine particles from plenums, filter housings, and floor corners where brooms cannot reach
- Lint-free microfiber cloths: Wipe down surfaces without leaving fibers that contaminate the next paint job
- Specialized surface prep cleaner: Removes oils, silicone residue, and solvent films that generic soaps leave behind
Safety equipment you must wear:
- Certified respirator (NIOSH-approved): Protects against solvent vapors and fine particulate matter during chemical cleaning
- Nitrile gloves: Prevent skin oils from transferring to cleaned surfaces and protect against chemical exposure
- Eye protection (chemical splash goggles): Guards against cleaner splatter during wipe-down phases
Tool selection directly affects contamination prevention. A wet/dry vacuum with a HEPA filter captures particles that a standard shop vac recirculates into the air. Lint-free microfiber cloths trap particles rather than redistributing them, which is the failure mode of cotton rags.
Pro Tip: Label your booth-specific cleaning tools and store them inside the booth or in a sealed cabinet. Cross-contaminating booth tools with general shop tools is one of the fastest ways to introduce grease and grit onto a freshly cleaned surface.
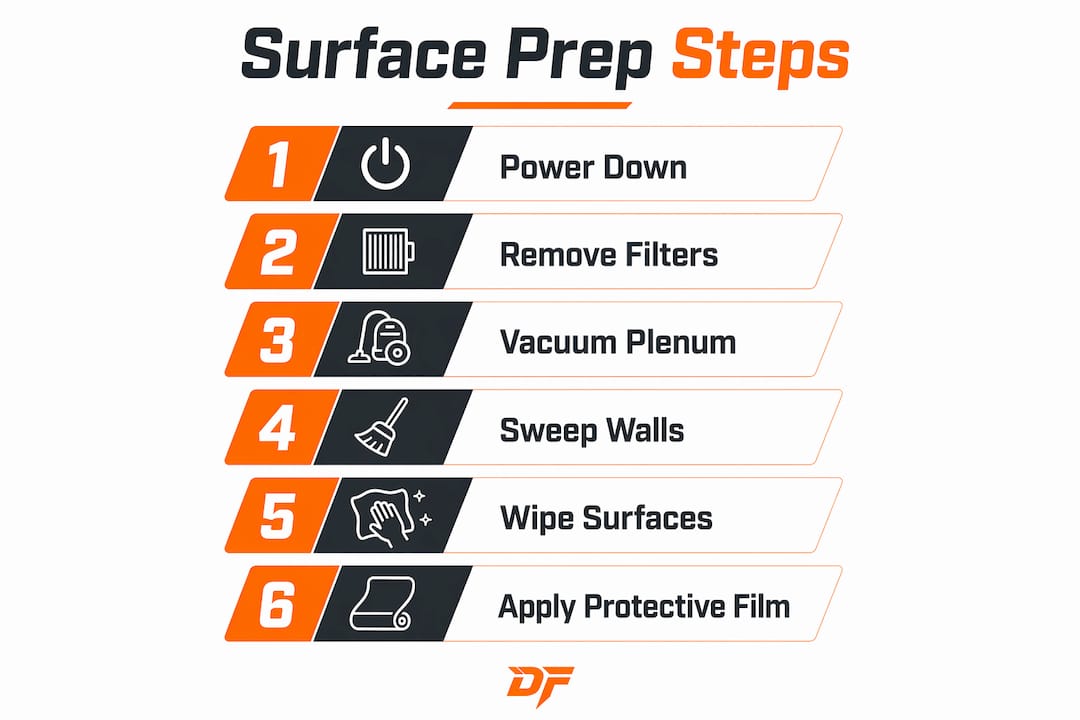
Step-by-step process for booth surface prep deep cleans
A structured sequence prevents the most common failure in booth cleaning: debris falling from upper surfaces onto areas you already cleaned. Strict top-to-bottom sequencing is the rule that separates professional results from amateur rework. Follow these eight steps in order, without skipping.
-
Power down and ventilate. Shut off the booth’s heating and spray systems. Open doors and run the exhaust fan on low to clear residual solvent vapors before personnel enter. Check that the booth atmosphere is safe before any cleaning begins.
-
Remove loose items and old filters. Pull out all masking materials, used filter pads, and any equipment left from the previous job. Bag used filters immediately. Do not shake them inside the booth.
-
Vacuum plenums and filter housings. Use the wet/dry vacuum to pull accumulated dust and overspray from plenum chambers and filter frames. These areas trap the highest concentration of airborne particles and are frequently skipped.
-
Sweep walls and ceiling top to bottom. Use the soft bristle broom starting at the ceiling and working down to the floor. This sequence deposits debris at the lowest point for collection rather than scattering it across cleaned lower surfaces.
-
Wipe all surfaces with a specialized cleaner. Apply a silicone-free surface prep cleaner to walls, ceiling panels, and light fixtures using lint-free microfiber cloths. Work in sections. Replace cloths frequently to avoid spreading dissolved contamination.
-
Scrub and vacuum the floor. Use the stiff floor brush to break up dried overspray, then vacuum the entire floor surface. Pay extra attention to corners and the area around drain grates where solvents pool and dry.
-
Install fresh intake and exhaust filters. Filters must be replaced, not cleaned, to maintain airflow integrity. Inspect filter frames for gaps or damage before installing new pads. A poorly seated filter allows unfiltered air to bypass the media entirely.
-
Perform a final inspection under proper lighting. Use a high-intensity work light or UV inspection lamp to reveal dust, lint, and residue invisible under standard booth lighting. Run a gloved hand along surfaces to detect texture that indicates remaining contamination.
| Step | Tool | Common mistake |
|---|---|---|
| Plenum vacuum | Wet/dry vacuum with HEPA filter | Skipping plenums entirely |
| Wall and ceiling sweep | Soft bristle broom | Sweeping bottom to top |
| Surface wipe-down | Lint-free microfiber + silicone-free cleaner | Using cotton rags or generic soap |
| Floor scrub and vacuum | Stiff brush + wet/dry vacuum | Vacuuming before scrubbing |
| Filter replacement | Certified replacement filter pads | Cleaning and reinstalling used filters |
Pro Tip: Schedule deep cleans at the end of a production shift, not the beginning. Cleaning before the booth sits overnight allows any disturbed particles to settle and be removed during a quick final vacuum before the next job starts.
How to prep booth surfaces before applying protective films
Surface cleanliness for protective film application is more demanding than cleanliness for painting alone. A professional-grade surface prep cleaner maximizes film adhesion by removing contaminants that generic soaps leave as invisible residue. Any oil, silicone trace, or solvent film left on the substrate will cause the protective film to lift, bubble, or peel under heat and airflow.
Critical requirements before film application:
- Completely dry surface: Moisture trapped under film creates bubbles that collect dust and eventually cause the film to delaminate. Allow surfaces to dry fully after wet cleaning before applying any film.
- Residue-free substrate: Specialized silicone-free cleaners prevent fish-eye defects and ensure the film’s adhesive bonds to the wall or floor panel rather than to a layer of contamination.
- Temperature-matched film selection: Using a film not rated for the booth’s maximum curing temperature causes film degradation and creates a cleaning problem worse than having no film at all. Match the film’s heat resistance specification to your booth’s operating range.
- Static-free application environment: Electrostatic charge on booth walls attracts airborne dust immediately after cleaning. Anti-static films, like those manufactured by Dustfreefilm, reduce this attraction and keep surfaces cleaner between jobs.
Pro Tip: Apply protective film within 30 minutes of completing the final surface wipe-down. The longer a cleaned surface sits exposed in an active shop environment, the more airborne contamination settles onto it before the film goes on.
For a detailed walkthrough of the application sequence, the film application guide from Dustfreefilm covers bubble-free installation using their patented dispenser system.
What role do booth airflow and layout play in surface preparation?
Airflow design determines whether your cleaning effort holds or gets undone within minutes. Poor airflow redistributes dust rather than evacuating it, which means a perfectly cleaned surface can be recontaminated before the first coat of paint is applied. Surface preparation effectiveness depends as much on booth engineering as on manual cleaning technique.
Layout directly affects how well cleaning works. Maintaining 3–4 feet of clearance around the largest parts in the booth gives operators room to clean thoroughly without compressing debris into corners. Tight layouts force operators to work around obstacles, leaving contaminated zones that feed particles back into the airstream.
| Airflow condition | Effect on surface prep | Corrective action |
|---|---|---|
| Balanced cross-flow | Particles move toward exhaust filters consistently | Maintain filter integrity and replace on schedule |
| Turbulent or uneven flow | Dust recirculates and redeposits on cleaned surfaces | Check for blocked intakes or damaged baffles |
| Insufficient exhaust volume | Airborne particles settle rather than evacuate | Verify fan performance and filter loading |
| No dust collection during cleaning | Cleaning activity generates airborne particles that resettle | Run exhaust fan on low during all cleaning phases |
Dust collection systems must run concurrently with cleaning operations, not just during painting. Running the exhaust fan at low speed while sweeping and vacuuming captures the particles your cleaning tools dislodge before they can resettle. This single practice reduces the number of cleaning passes required and shortens total prep time.
Facility managers responsible for booth safety zones should also account for fire safety zone protocols when designing airflow and personnel movement patterns around active cleaning operations.
Common mistakes and troubleshooting tips in booth surface preparation
Most booth contamination problems trace back to a small set of repeatable errors. Contamination mostly enters through personnel and equipment, not just through air filtration failures. That means the prep area outside the booth is as important as the booth interior itself.
The most common mistakes:
- Skipping the top-to-bottom sequence. Sweeping floors before walls deposits ceiling and wall debris onto a surface you just cleaned. This creates redundant work and raises contamination risk.
- Using standard cleaning chemicals. Standard cleaning solutions leave residues that cause fish-eye defects and poor paint adhesion. Only silicone-free, film-forming-agent-free cleaners belong inside a spray booth.
- Neglecting the prep area outside the booth. Tracked-in debris from dirty floors, contaminated clothing, or uncleaned tools accounts for a significant share of booth contamination. Maintenance protocols must extend to the prep bay and all tools entering the booth.
- Cleaning rather than replacing filters. Attempting to clean and reinstall used filters compresses contamination into the media and disrupts airflow patterns. Replace filters on a fixed schedule and inspect frames at every cleaning cycle.
- Inadequate final inspection. Finishing a clean without a high-intensity lighting check leaves invisible contamination that shows up as inclusions in the cured paint film.
“The booth is only as clean as the last thing that walked into it. Operators who treat the prep bay as a separate, controlled zone consistently outperform those who focus exclusively on the booth interior. Contamination control starts at the shop door, not the booth door.”
Pro Tip: Keep a contamination log. Record the source of each paint defect traced back to surface prep failures. After three months, patterns emerge that reveal which step in your process is the consistent weak point.
Integrating these controls with a spray booth maintenance workflow that covers both cleaning and ongoing dust management produces the most consistent results.
Key Takeaways
A disciplined process for booth surface prep, executed in the correct sequence with the right tools and cleaners, is the single most reliable way to eliminate paint defects before they start.
| Point | Details |
|---|---|
| Follow top-to-bottom sequence | Always sweep and wipe from ceiling to floor to prevent debris from recontaminating cleaned surfaces. |
| Use silicone-free cleaners only | Generic soaps leave invisible residues that cause fish-eye defects and poor paint adhesion. |
| Replace filters, never clean them | Reinstalling used filters compresses contamination into the media and disrupts airflow integrity. |
| Run exhaust during cleaning | Operating the exhaust fan at low speed while cleaning captures dislodged particles before they resettle. |
| Match film heat resistance to booth specs | Protective films rated below the booth’s curing temperature degrade and create additional cleaning work. |
What I’ve learned from watching shops skip the basics
The shops that struggle most with paint quality are rarely the ones with bad painters. They are the ones with inconsistent surface prep. I have seen facilities invest in premium paint systems and then lose those gains entirely because someone swept the floor before the walls, or used a household degreaser that left a silicone film no one could see.
The insight that changed how I think about this process: contamination control is a system, not a checklist. Airflow, tool storage, prep bay cleanliness, and filter replacement schedules all interact. Fixing one element without addressing the others produces temporary improvement at best. The shops that consistently deliver flawless finishes treat surface preparation as an integrated protocol, not a series of isolated tasks.
Protective films are a force multiplier in this system. When booth walls and floors are covered with a properly applied, heat-resistant, anti-static film, the surface stays cleaner between deep cleans, and the deep clean itself takes less time. That is not a marginal gain. In a high-volume shop, it compounds into hours of recovered production time each week. Choosing the right film for your booth conditions, as outlined in Dustfreefilm’s film selection guide, is as important as the cleaning process itself.
The professionals who treat surface prep as a discipline rather than a chore are the ones whose work holds up under inspection.
— Dust
How Dustfreefilm supports your booth prep program
Dustfreefilm manufactures multi-layer electrostatic protective films built specifically for spray booth walls and floors. Their products are heat-resistant, static-free, and designed for high-traffic industrial environments where contamination control is non-negotiable.
The patented dispenser system allows quick, bubble-free installation directly after surface cleaning, locking in the cleanliness your prep work created. Films are available in custom configurations for booths of any size, with European manufacturing standards backing every roll. For facilities running high-volume refinishing or industrial coating operations, Dustfreefilm’s booth protection solutions reduce cleaning frequency, protect surfaces between jobs, and support the kind of consistent finish quality that keeps customers coming back.
FAQ
What is the correct sequence for booth surface prep steps?
The correct sequence runs from top to bottom: power down, remove old filters, vacuum plenums, sweep walls and ceiling, wipe all surfaces with a silicone-free cleaner, scrub and vacuum the floor, install fresh filters, then perform a final inspection under high-intensity lighting.
Why can’t I use standard degreasers for surface cleaning in booths?
Standard cleaning solutions leave silicone and film-forming residues that cause fish-eye defects and reduce paint adhesion. Only professional-grade, silicone-free surface prep cleaners are appropriate for spray booth surfaces.
How does airflow affect booth surface preparation results?
Poor airflow redistributes dislodged particles rather than evacuating them, recontaminating surfaces you just cleaned. Running the exhaust fan at low speed during cleaning captures airborne particles before they resettle.
How often should intake and exhaust filters be replaced?
Filters must be replaced on a fixed schedule and inspected at every cleaning cycle. Cleaning and reinstalling used filters compresses contamination into the media and disrupts airflow, which defeats the purpose of the deep clean.
When should protective film be applied after surface prep?
Apply protective film within 30 minutes of completing the final surface wipe-down. Longer exposure allows airborne contamination to settle onto the cleaned surface before the film seals it.