
TL;DR:
- Proper surface preparation is essential to prevent coating failures and ensure longevity.
- Peelable films offer quick reapplication and contamination control, while epoxy coatings provide long-term durability.
- Consistent installation discipline and maintenance routines are key to maintaining spray booth floor performance.
A failed floor coating in an active spray booth does more than look bad. It creates contamination risks, disrupts your finishing schedule, and forces unplanned downtime that eats into your margins. Facilities that skip proper installation steps often find themselves recoating floors every year or dealing with paint adhesion issues caused by dust kicked up from damaged surfaces. This guide walks you through every phase of floor protection installation, from gathering the right tools to maintaining your solution long after the job is done. Whether you are evaluating peelable films or permanent coatings, the steps here are built for spray booth operators who need results, not theory.
Table of Contents
- Essential tools and materials for floor protection installation
- Surface preparation: The foundation for lasting protection
- Step-by-step installation: Permanent and peelable solutions compared
- Troubleshooting, verification, and maintenance for spray booth floors
- A practical perspective: Why efficiency depends on install discipline
- Enhance your booth efficiency: Trusted floor protection solutions
- Frequently asked questions
Key Takeaways
| Point | Details |
|---|---|
| Preparation is critical | Most installation failures start with inadequate surface preparation, so focus on thorough cleaning and testing. |
| Choose the right solution | Understand the trade-offs between permanent and peelable options to match your facility’s needs and downtime limits. |
| Follow step-by-step guidance | A clear, systematic installation process ensures maximum floor protection and minimizes disruptions in spray booth operations. |
| Verify and maintain | Regularly check and maintain your floor protection for consistent results and long service life. |
Essential tools and materials for floor protection installation
Before you touch a floor, you need the right tools in hand. Rushing into installation without a complete materials checklist is one of the fastest ways to create problems that cost more to fix than prevent. The good news is that both peelable and permanent solutions share some common requirements, which makes planning straightforward once you know what to look for.
For peelable floor protection films, your setup is relatively light. You will need a clean roller or applicator squeegee, a utility knife for trimming edges, and a tape measure to confirm coverage dimensions. The essential floor protection film you select should match your booth dimensions and traffic load. For facilities running high vehicle throughput, multi-layer films with static-free properties are worth the investment.
For permanent epoxy coatings, the material list is longer. Permanent epoxy coatings require specific tools and materials for proper installation, including mixing paddles, notched trowels, spiked rollers for aggregate broadcast, and a floor grinder for surface profiling. You will also need primer, body coat, and topcoat components, plus anti-slip aggregate if your booth floor sees heavy foot traffic.
Safety gear is non-negotiable for both methods:
- Chemical-resistant gloves
- Safety glasses or a full face shield
- Knee pads for floor-level work
- Respirator rated for solvent vapors (for epoxy work)
- Non-slip footwear
Here is a quick comparison of what each solution demands at the materials stage:
| Item | Peelable film | Permanent epoxy |
|---|---|---|
| Application tools | Squeegee, roller, knife | Trowel, grinder, mixer |
| Safety gear | Gloves, glasses | Full PPE including respirator |
| Cure time needed | None | 72+ hours |
| Skill level required | Low | Moderate to high |
| Material cost per sq ft | Lower | Higher upfront |
For a broader look at what fits your operation, reviewing your floor protection options before purchasing helps avoid over-specifying or under-protecting. A solid flooring trim guide can also help you plan edge transitions that prevent film lift or coating edge failures.
Pro Tip: Lay out all tools and materials the day before installation. A missing squeegee or the wrong primer ratio discovered mid-job will cost you far more time than a 20-minute pre-check.
Surface preparation: The foundation for lasting protection
Here is a number worth remembering: 95% of coating failures are due to poor surface preparation. That is not a minor factor. It is the single biggest variable between a floor that performs for years and one that starts failing within weeks.
Surface prep for spray booth floors follows a clear sequence. Skip any step and you are gambling with your facility’s efficiency.
Step-by-step surface preparation:
- Remove all debris and loose material. Sweep and vacuum the entire floor area. Any grit left behind will create voids under film or prevent epoxy from bonding.
- Degrease thoroughly. Use a commercial degreaser rated for concrete or coated surfaces. Oil contamination from vehicle fluids is common in spray booths and invisible to the naked eye.
- Profile the surface. For epoxy installations, grind or shot-blast the floor to achieve a CSP 2-3 surface profile. This creates a texture that gives the coating something to grip. Skipping this step is the most common cause of delamination.
- Conduct a moisture test. Epoxy coatings require a moisture level below 3 lbs per 1,000 sq ft per 24 hours. Use a calcium chloride test kit. High moisture causes bubbling and adhesion failure.
- Repair cracks and joints. Fill any cracks with an appropriate filler and allow it to cure fully before proceeding.
- Final clean pass. Vacuum again and wipe with a tack cloth or isopropyl alcohol to remove dust raised during grinding.
A floor that looks clean is not necessarily ready for coating. Invisible contaminants and moisture are the two most common surprises that derail installations on the day of application.
For peelable films, the prep is simpler but still matters. The floor must be clean, dry, and free of raised edges or debris that could create air pockets under the film. Even a small piece of grit under a peelable film can create a bubble that collects overspray and becomes a contamination source.
Pro Tip: Schedule surface prep outside of operating hours. Grinding and degreasing create dust and fumes that can contaminate active paint jobs in adjacent areas. A Saturday prep session protects your Monday production schedule.
For facilities developing longer-term floor protection strategies, building surface prep into a recurring maintenance calendar reduces the time and cost of each subsequent installation. Consistent prep also ties directly to preventing dust for quality finishes, which is the core goal of every floor protection decision you make.
Step-by-step installation: Permanent and peelable solutions compared
With surfaces ready, execution is where discipline pays off. Both permanent and peelable solutions have distinct installation sequences. Mixing up steps or skipping stages creates problems that surface days or weeks later.
Permanent epoxy installation steps:
- Apply primer coat and allow to tack (typically 4-6 hours depending on temperature).
- Broadcast anti-slip aggregate evenly across the wet primer if required.
- Apply the body coat using a notched trowel or roller, working in sections to maintain a wet edge.
- Allow body coat to cure to the manufacturer’s specification before topcoat application.
- Apply topcoat in a single, even pass. Avoid going back over partially cured areas.
- Allow full cure before returning the booth to service. Permanent coatings require 72+ hours cure time before vehicle traffic is permitted.
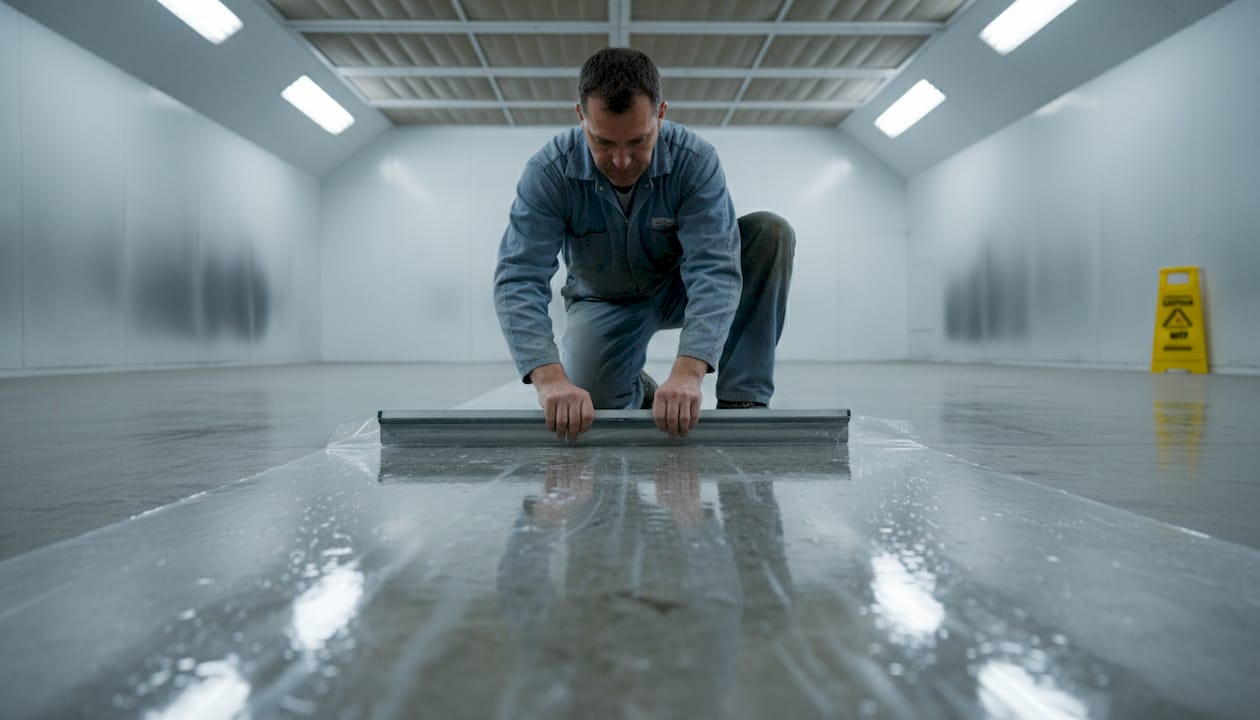
Peelable film installation steps:
- Confirm floor is clean, dry, and at the correct temperature for film adhesion.
- Unroll film from the dispenser, starting at one wall and working toward the opposite side.
- Use a squeegee to press the film flat, working out any air from the center toward the edges.
- Trim edges with a utility knife, leaving a small overlap at walls.
- Inspect the full surface for bubbles or lifted edges before resuming booth operations.
- Reapplication after removal takes under 30 minutes for most booth sizes.
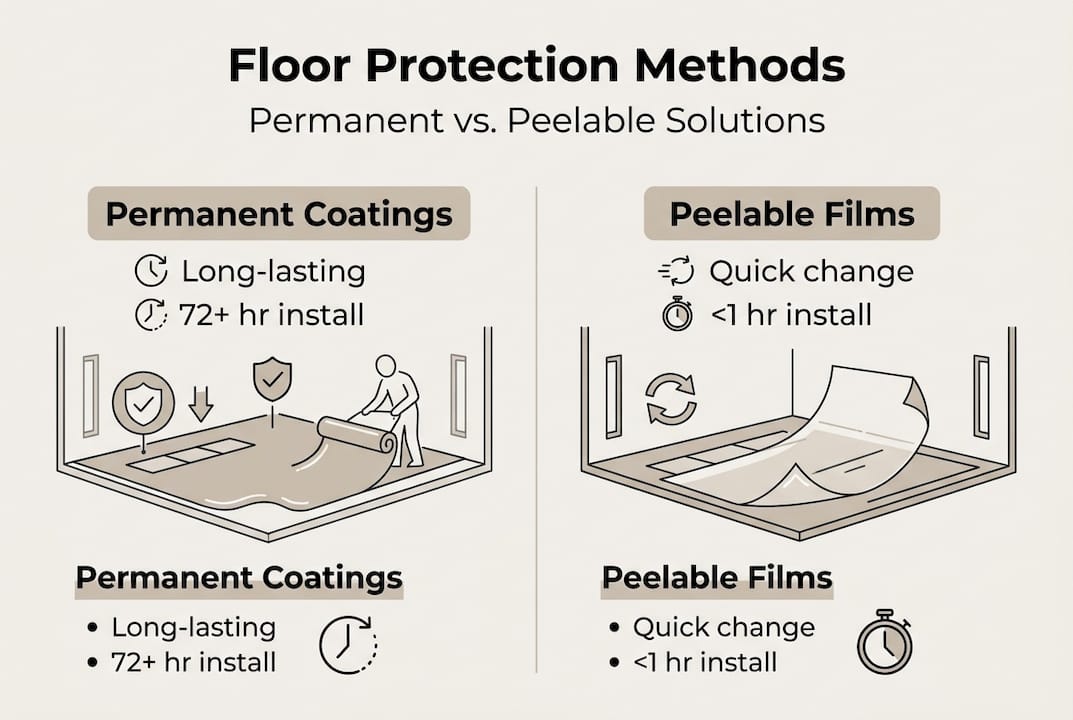
Here is how the two approaches compare across the metrics that matter most to facility managers:
| Factor | Permanent epoxy | Peelable film |
|---|---|---|
| Downtime for install | 72+ hours | Under 1 hour |
| Service life | 5-20 years | Per job cycle |
| Reapplication speed | Not applicable | Under 30 minutes |
| Contamination control | Moderate | High (fresh layer each time) |
| Total cost over 5 years | Lower (if maintained) | Varies by usage volume |
The floor protection tutorial from our team walks through real booth configurations in detail. For a side-by-side product breakdown, the expert floor protector comparison covers the specific performance differences that affect high-volume operations.
The key insight here: peelable films win on flexibility and contamination control. Permanent coatings win on long-term cost when your booth layout is stable and overspray exposure is predictable.
Troubleshooting, verification, and maintenance for spray booth floors
Installation is not the finish line. What happens in the weeks and months after determines whether your investment holds up or becomes a recurring problem.
Common post-install issues and how to fix them:
- Bubbles under peelable film: Usually caused by debris or moisture trapped during application. Lift the film, clean the area, and reapply. Do not try to smooth bubbles out after the film has set.
- Peeling edges on epoxy: Often a sign of insufficient surface profile or missed moisture testing. Sand the edge, apply a compatible primer, and feather in a repair coat.
- Curing failures in epoxy: Typically caused by incorrect mix ratios or low ambient temperature during cure. Follow manufacturer temperature guidelines and use a thermometer to verify booth conditions before applying.
- Uneven coverage: Recheck your application technique. Epoxy body coats applied too thin in sections will show wear unevenly within months.
Verification checks after installation:
For epoxy, perform an adhesion test by pressing a piece of tape firmly against the cured surface and pulling it back sharply. Any coating that lifts indicates a bonding issue that needs addressing before the booth goes back into service. Check for uniform sheen across the entire floor. Dull patches signal thin coverage.
For peelable films, walk the entire floor and press down any edges that have not fully adhered. Look for bubbles by raking light across the surface at a low angle. Even small bubbles collect overspray particles and become contamination sources over time.
Epoxy service life ranges from 5-8 years for light traffic and can reach 20 years with MMA formulations when properly maintained. That range collapses quickly without routine care.
Most common maintenance mistakes to avoid:
- Using abrasive cleaners that degrade the topcoat
- Allowing chemical spills to sit without immediate cleanup
- Ignoring small edge lifts on peelable films until they become large contamination zones
- Skipping periodic adhesion checks on permanent coatings
- Failing to replace peelable films on a consistent schedule tied to job volume
Pro Tip: Schedule maintenance checks during your lowest-traffic window of the week. A 15-minute walk-through during a shift change catches small issues before they become production stops.
For real-world examples of how these principles apply across different facility types, the protective film applications resource covers a range of scenarios. Understanding why floor protection matters most in spray booth environments also reinforces the maintenance discipline that separates high-performing shops from those dealing with constant rework. For facilities managing floor-to-wall transitions, a reducing trip hazards guide helps address edge safety alongside protection performance.
A practical perspective: Why efficiency depends on install discipline
After years of working with spray booth operators across automotive and industrial settings, one pattern stands out clearly: the facilities with the fewest floor-related disruptions are not the ones with the most expensive products. They are the ones with the most consistent processes.
The temptation to cut corners is real. A peelable film applied over a slightly damp floor saves 20 minutes today and costs two hours of rework next week. An epoxy coat applied at the wrong temperature saves a day of waiting and fails within a season. These are not hypothetical scenarios. They are the most common calls we hear from facilities that skipped a step.
What actually works is treating installation as a repeatable system, not a one-time event. That means documented prep steps, trained staff who know why each step matters, and scheduled verification checks that happen whether or not anything looks wrong. The strategies for dust-free shops that deliver consistent results are built on this kind of operational discipline. Product quality matters. But process discipline is what makes the product perform.
Enhance your booth efficiency: Trusted floor protection solutions
You now have a complete picture of what proper floor protection installation looks like, from the tools you need to the maintenance habits that extend service life. The next step is matching that knowledge to the right products for your facility.
At Dust Free Film, we have been engineering spray booth floor protection solutions since 2012, built specifically for the demands of automotive refinishing and industrial painting environments. Our multi-layer peelable films install in under an hour and deliver fresh, contamination-free surfaces between every job. If you are ready to reduce downtime and improve finish quality, explore our spray booth protection solutions or request a quote today. Our team works directly with facility managers to match the right solution to your booth size, traffic load, and production schedule.
Frequently asked questions
What is the main cause of epoxy floor coating failures?
Poor surface preparation is the leading cause, responsible for 95% of all coating failures in industrial and spray booth environments.
How long does a permanent epoxy floor coating last in a spray booth?
Epoxy coatings last 5-8 years under light traffic conditions and can reach up to 20 years when MMA formulations are used with proper maintenance.
What are the advantages of peelable floor protection in spray booths?
Peelable films allow fast reapplication between jobs, cutting reapplication time to under 30 minutes and keeping contamination risk low with each fresh layer.
How do you verify floor protection installation was successful?
Check for uniform coverage, firm adhesion with no lifting edges, and a bubble-free surface across the entire floor before returning the booth to active use.
What is the ideal maintenance schedule for spray booth floor protection?
Schedule routine checks and cleaning during low-traffic periods; replace peelable films consistently based on job volume rather than waiting for visible wear to appear.