
TL;DR:
- Dust contamination significantly increases costs in automotive refinishing by causing defects that require rework. Proper installation of dust protection film, including meticulous surface prep, correct handling, sealing seams, and post-installation verification, is essential for an effective booth barrier. Thorough preparation and adherence to detailed procedures ensure optimal dust protection and high-quality spray booth results.
Dust contamination is one of the most expensive problems in automotive refinishing. A single rogue particle settling into fresh clearcoat can mean a full rework, adding hours of labor and real dollars to a job that should have been finished. Knowing how to install dust protection film correctly is the difference between a booth that protects your work and one that merely looks the part. This guide walks automotive professionals and contractors through every phase of the process, from surface prep to post-installation verification, with the kind of specificity that actually changes outcomes.
Table of Contents
- Key Takeaways
- Tools and materials for dust protection film installation
- How to install dust protection film step by step
- Troubleshooting common installation problems
- Verifying installation quality and ongoing maintenance
- What I’ve learned from years in spray booth film installation
- Get the right film and support from Dustfreefilm
- FAQ
Key Takeaways
| Point | Details |
|---|---|
| Prep before everything | A clean, dust-free environment is mandatory before any film touches the wall or floor. |
| Use distilled water only | Tap water minerals cause spotting and adhesion failure during dust protection film application. |
| Handle film with slip solution | Oils from bare hands transfer contaminants that cause permanent defects under the film. |
| Seal every seam completely | Any gap or loose edge creates a bypass point that defeats the purpose of the entire installation. |
| Verify with airflow testing | Pressure checks and smoke tests after installation confirm the booth is genuinely dust-free. |
Tools and materials for dust protection film installation
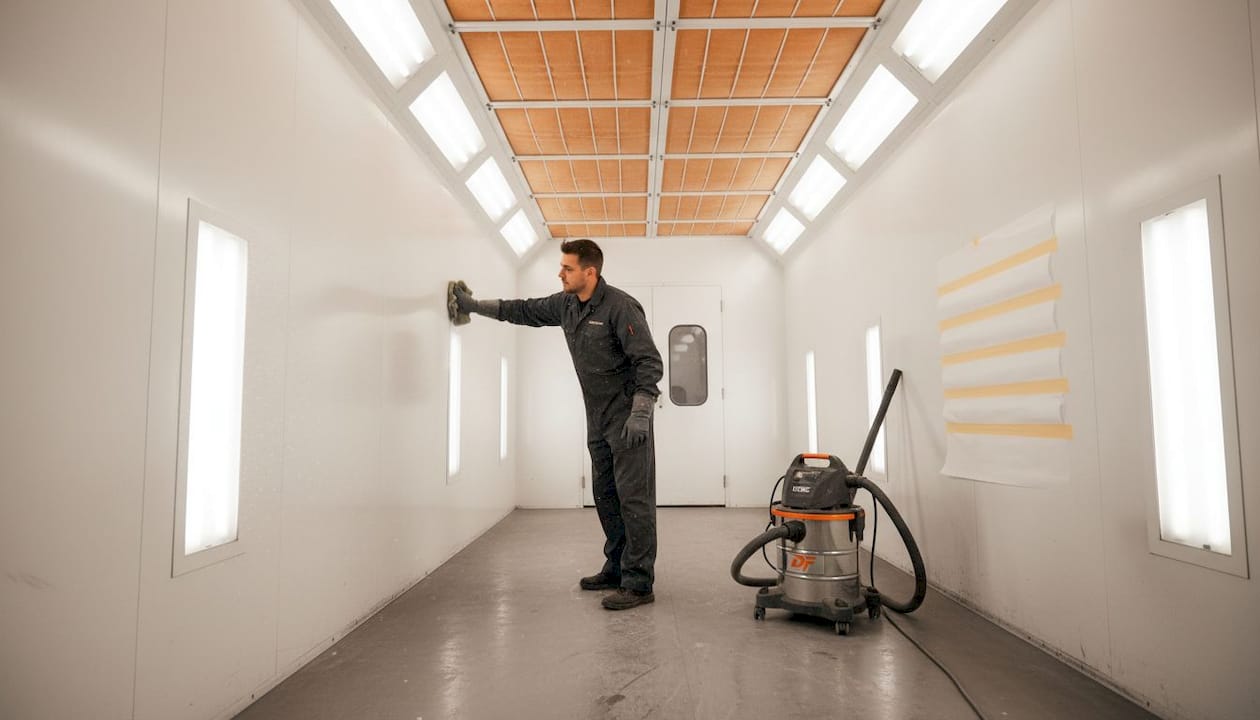
Before you roll out a single sheet of film, the booth itself needs to be ready. Rushing this phase is where most installations fail. The preparation phase is not a formality. It is the foundation everything else depends on.
What you need on hand
Gather these materials before starting:
- Distilled or demineralized water for mixing your slip solution. Tap water minerals cause spotting and adhesion interference that shows up immediately or days later.
- Slip solution concentrate or baby shampoo mixed with distilled water at a ratio of roughly one drop per liter.
- Hard card squeegee and a soft rubber squeegee for different stages of application.
- Utility knife or dedicated film cutter with fresh blades. Dull blades drag and tear edges.
- Lint-free microfiber cloths and a spray bottle.
- Measuring tape and a pencil for marking.
- Clean, powder-free nitrile gloves.
Site preparation
Installation should happen only after every other trade has finished work in or near the booth. Drywallers, electricians, and HVAC technicians all generate particulate. Scheduling your film application before they finish is a guaranteed way to contaminate the surface under the film.
Sweep and vacuum all surfaces. Wipe walls and floors with a damp lint-free cloth. Turn off any air movers or ventilation that could blow debris across freshly cleaned surfaces. Give the booth thirty minutes with the door closed before you start. You want the air to settle, not circulate.
Pro Tip: Tape a strip of clean white paper to the booth floor before final surface cleaning. Drag it across the surface after your wipe-down. If it picks up visible debris, clean again.
How to install dust protection film step by step
This is the core of the dust film installation guide. Work methodically. Speed is the enemy of a clean result.
-
Clean the target surface one final time. Use your distilled water and a fresh microfiber cloth. Work from the top of the wall down, or from the center of the floor out to the edges. Never re-wipe an area you have already cleaned with the same cloth pass.
-
Wet the surface with slip solution. Spray a generous coat across the area where you are about to apply the film. This prevents premature adhesion and lets you reposition the film during alignment.
-
Prepare your hands. Professional installers wet their fingers with slip solution before touching the adhesive side of any film. Skin oils and microscopic debris transfer instantly to the adhesive and create visible defects once the film sets. This step is non-negotiable.
-
Peel and position the film. For wall panels, have a second person hold the top edge while you peel the liner from the bottom. For floor films, work in manageable sections rather than trying to handle a full roll at once. Let the adhesive side face the surface but keep it slightly off the wall or floor using the slip solution buffer.
-
Align and set the top edge first. Press the top edge into position with your squeegee. Once the top is locked, work downward in overlapping horizontal strokes. Apply moderate, even pressure. You are pushing water and air out, not pressing hard enough to stretch the film.
-
Squeegee out air and water. Use a firm, overlapping stroke pattern moving from the center toward the edges. Smooth, wrinkle-free installation is not just cosmetic. Wrinkles and poor fit create turbulence in spray booths that traps dust and disrupts laminar airflow.
-
Trim edges cleanly. Use a fresh blade and a straightedge. Cut with a single confident stroke rather than sawing. Leave no overhanging film at seams. Every seam must be properly closed to eliminate bypass points where unfiltered air can enter.
-
Allow adequate drying time before final contact. Premature trimming or handling before the film fully cures leads to shrinkage. Shrinkage opens gaps at edges and corners. Most films need a minimum of 24 to 48 hours of cure time in normal shop conditions before they should be disturbed.
Pro Tip: When installing floor film, place temporary cardboard walkways over freshly applied sections so foot traffic does not stress the edges during your own continued installation work.
The steps for installing film on ceiling panels follow the same sequence, but work in smaller sections. Ceiling applications are higher-risk for contamination because debris falls. Keep the spray bottle of slip solution within reach and work fast once the liner is peeled.

Troubleshooting common installation problems
Even experienced installers encounter problems during dust protection film application. Recognizing them quickly prevents them from becoming permanent.
Bubbles that won’t squeegee out usually mean the surface wasn’t wet enough with slip solution during application. Small bubbles often work out on their own over 24 to 48 hours if the surface was clean. Larger bubbles with debris trapped inside require lifting and reapplying that section. Don’t try to puncture them. A pinhole becomes a contamination entry point.
Wrinkles at edges and corners happen when the film is stretched during application rather than laid flat. Ventilation systems can also introduce airflow that causes partially applied film to shift before it sets. Close the booth and shut down HVAC during installation.
Loose seams are the most serious problem because they create the exact bypass points that let contaminated air into the booth. Check every seam by running a gloved finger along the edge. Any section that lifts must be re-pressed with a squeegee or recut and overlapped.
Seam integrity is not optional. A booth that looks fully covered but has three loose seams is functionally the same as a booth with three open holes.
Contamination from handling is the most common source of hidden defects. Touching the adhesive side with bare or dusty gloves transfers oils and particles that appear as spots or fisheyes once paint is applied. Always use fresh nitrile gloves and keep slip solution on your fingers throughout the job.
Pro Tip: Change your gloves every 20 to 30 minutes during a long installation session. Gloves accumulate booth dust on their outer surface, and that dust transfers to the film.
Verifying installation quality and ongoing maintenance
A completed installation is not a finished job until you have confirmed it actually works.
-
Perform a smoke test. Use a smoke pencil or smoke candle at each seam and corner while the booth is under negative pressure. Smoke drawn toward any gap identifies a leak that needs repair before painting begins.
-
Check airflow direction and pressure. Verify airflow direction and measure pressure before and after installation. Document your baseline static pressure readings. Deviation from your documented baseline after a film replacement signals a seating or seam problem.
-
Inspect the paint finish after the first test spray. The first vehicle through a newly filmed booth tells you more than any instrument. Look for nib defects, texture problems, or recurring dust patterns in specific zones. These map directly to problem areas in the film.
-
Schedule regular maintenance checks. Multi-layer film products allow you to peel individual layers rather than replacing the entire film. Record the date of each peel and the condition of the layer removed. This creates a maintenance log that helps you spot patterns in contamination.
-
Clean in-place surfaces periodically. Tack cloths used on floor films between paint jobs prevent particulate buildup on the film surface. Consistent light maintenance extends film life significantly and keeps booth conditions stable between major replacements.
For a deeper technical look at spray booth film selection, the film type you choose affects how much maintenance you’ll actually need.
What I’ve learned from years in spray booth film installation
I’ve watched shops install dust protection film and declare the job done without running a single verification check. Then they spend the next three months wondering why their clear coats aren’t coming out clean. The film wasn’t the problem. The installation process was.
Preparation takes longer than the actual film application. In my experience, the ratio is roughly 60 percent prep to 40 percent installation. Shops that reverse that ratio get mediocre results and blame the film. What they’re really dealing with is contamination that was baked in before the first panel was applied.
The detail I see most consistently skipped is the finger cleaning step. It sounds minor. It is not. I’ve seen booths where fingertip oil spots showed up as repeating patterns of fisheyes in clearcoat across an entire hood. Tracing that defect back to the film took an hour. The fix took a full reinstall.
My honest take: DIY dust protection film installation is absolutely achievable for trained professionals. But “trained” means you know the verification steps, not just the application steps. Anyone can stick film to a wall. The skill is knowing whether what you installed actually works.
— Dust
Get the right film and support from Dustfreefilm
Getting the installation right starts with using film that’s engineered for spray booth conditions. Dustfreefilm has been manufacturing premium dust protection films for automotive refinishing and industrial painting environments since 2012. Their multi-layer electrostatic wall and floor protectors are heat-resistant, static-free, and built for high-traffic commercial use.
Whether you need a complete film installation guide or want to consult with their team on product specifications for your booth configuration, the resources are there. Visit DustFreeFilm.com to explore their full product range, access technical guides, and get support from people who understand exactly what your booth demands. Custom configurations and bulk purchasing options are available for operations running multiple booths.
FAQ
How do I prepare a spray booth before installing dust protection film?
Complete all other construction or maintenance work first, then thoroughly clean and vacuum all surfaces. A dust-free work area is mandatory before any film is applied, and ventilation should be shut down to prevent airborne contamination during installation.
Why should I use distilled water instead of tap water for slip solution?
Tap water contains minerals that cause spotting and interfere with adhesive bonding during dust protection film application. Distilled or demineralized water produces a clean slip solution that does not leave residue under the film.
How long should I wait before trimming edges after installing protective film?
Allow a minimum of 24 to 48 hours of cure time before trimming or applying significant contact to the film. Premature handling causes film shrinkage, which opens gaps at edges and compromises dust protection.
What is the best way to check if my booth film installation is sealed correctly?
Use a smoke pencil along every seam and corner while the booth runs under negative pressure. Any smoke drawn toward a gap reveals a bypass point that must be sealed before painting begins.
Can I install dust protection film in a spray booth without professional help?
Yes, trained automotive professionals and contractors can complete a DIY dust protection film installation successfully. The key is following a methodical film installation guide that covers preparation, application technique, and post-installation verification rather than treating it as a simple adhesive job.