
La poussière qui se dépose sur les surfaces fraîchement peintes est le casse-tête de tout chef d’usine lors des périodes de production chargées. Obtenir des finitions uniformes et irréprochables dépend du contrôle des contaminants bien avant le début de la pulvérisation. Les responsables d’installation dans la peinture automobile et industrielle savent que respecter les normes européennes nécessite plus qu’un simple nettoyage de routine. Ce guide vous guide à travers les étapes éprouvées de la préparation, de l’application du film, de la configuration du système et de la vérification, afin de garantir que votre stratégie de contrôle de la poussière donne des résultats et maintient vos stands à leur efficacité optimale.
Table des matières
- Étape 1 : Préparer les surfaces de cabine pour l’application du film protecteur
- Étape 2 : Installer des films de protection contre la poussière haut de gamme sur les murs et les sols
- Étape 3 : Configurez le système de distributeurs électrostatiques pour l’efficacité
- Étape 4 : Scellez les zones critiques pour maximiser le confinement de la poussière
- Étape 5 : Vérifier des conditions sans poussière et une qualité de finition supérieure
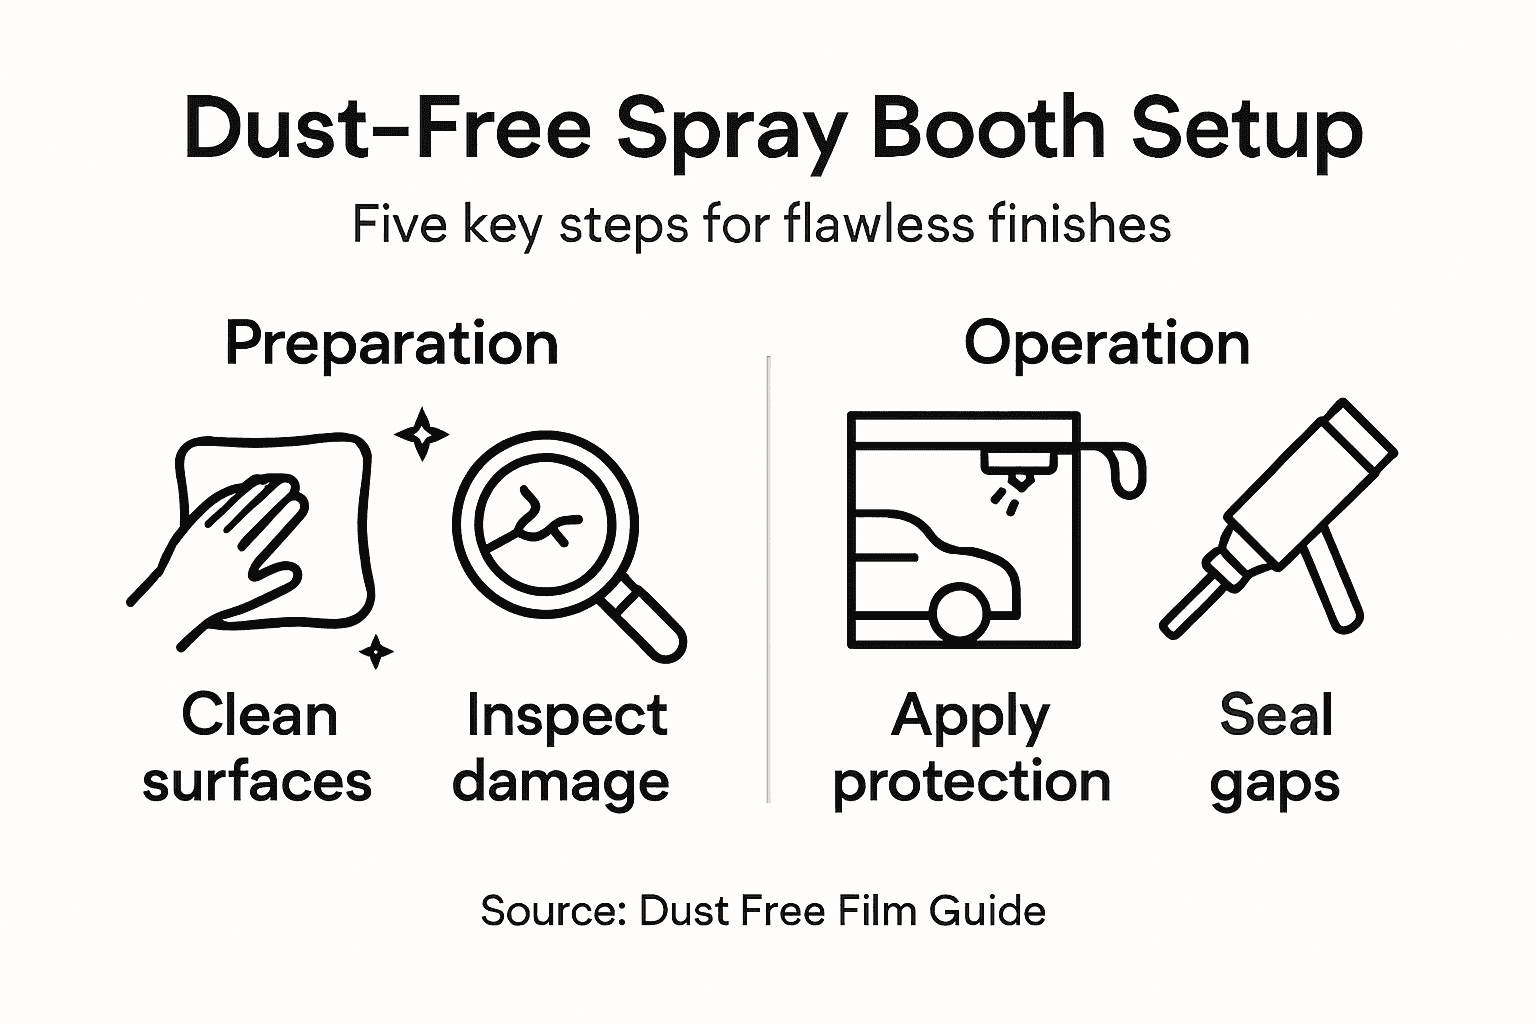
Résumé rapide
| Explication clé de l’intuition | |
|---|---|
| 1. Nettoyer soigneusement les surfaces avant l’application du film | Éliminer la poussière et les débris assure une bonne adhérence du film et évite la contamination des finitions. Privilégiez la propreté pour la durabilité. |
| 2. Appliquez méthodiquement les films pour une adhérence optimale | Utilisez une pression contrôlée et des joints de chevauchement lors de l’installation pour éviter les bulles et assurer une barrière protectrice continue. |
| 3. Configurer correctement le système électrostatique | Assurez-vous de la mise à la terre et ajustez les réglages de l’air pour améliorer l’efficacité du transfert et la qualité de la finition. Vérifiez régulièrement la résistivité pour des performances optimales. |
| 4. Sceller tous les points de fuite potentiels | Inspectez et scellez les interstices des portes, fenêtres et installations pour éviter toute contamination extérieure. Utilisez des matériaux industriels pour la durabilité. |
| 5. Effectuer une vérification de routine des conditions | Effectuez régulièrement des inspections visuelles, des contrôles de débit d’air et des pulvérisations de test pour maintenir des environnements sans poussière et une qualité de finition élevée. |
Étape 1 : Préparez les surfaces des cabines pour l’application du film protecteur
Préparer les surfaces de votre cabine de pulvérisation pour l’application du film protecteur est la base pour obtenir des finitions de haute qualité sans poussière. Cette étape détermine si votre film adhère correctement, dure bien une utilisation intensive et empêche réellement la contamination d’endommager votre travail. Si vous n’avez pas une bonne préparation, vous verrez des particules de poussière s’incruster dans des revêtements fraîchement appliqués. Si vous faites bien, votre film protecteur devient une barrière invisible qui maintient vos finitions parfaites.
Commencez par retirer tout ce qui est en vrac sur les surfaces de votre cabine. La poussière, les éclats de peinture meubles, les résidus de graisse et les débris sont vos ennemis ici. Utilisez d’abord un aspirateur avec un filtre fin pour capturer les particules plus grosses, puis utilisez ensuite des chiffons propres ou des chiffons en microfibre pour essuyer les murs et les sols. Faites une attention particulière aux coins, rebords et aux zones texturées où la poussière aime se cacher. Les surfaces doivent être propres et sèches avant l’application pour garantir une bonne adhérence et prolonger la durabilité du film, il ne faut donc pas précipiter cette phase. Si vous constatez des résidus de graisse ou tenaces, utilisez une solution dégraissante adaptée à la construction de votre cabine, mais rincez soigneusement et laissez tout sécher complètement avant de continuer.
Ensuite, inspectez attentivement la surface de votre cabine pour détecter des dommages nécessitant une intervention. Cherchez des zones rugueuses, des ennuies ou des zones où les anciens revêtements ont commencé à s’écailler. Des surfaces lisses garantissent que votre film protecteur reste à ras contre le substrat, créant une barrière uniforme. Si vous repérez des imperfections, poncez-les légèrement ou réparez-les avec un matériau de remplissage approprié, laissez alors un temps de durcissement suffisant. Faites particulièrement attention aux transitions de sol, aux joints des murs et à tout endroit où l’eau ou les éclaboussures peuvent s’accumuler. Lors d’une inspection approfondie de la cabine, souvenez-vous que l’élimination préalable des solvants et des contaminants est essentielle pour obtenir de meilleurs résultats. Une fois les surfaces lisses et complètement propres, vous êtes prêt à appliquer votre film protecteur. Plus votre travail de préparation est bon aujourd’hui, plus votre contrôle de la poussière devient efficace et plus votre film protecteur dure longtemps dans de vraies conditions de production.
Astuce de pro : Faites fonctionner le système de ventilation de votre cabine à pleine capacité pendant 15 minutes après le nettoyage pour éliminer toute poussière persistante avant de commencer l’application du film, afin d’assurer une adhérence maximale et aucune contamination piégée entre le film et la surface.
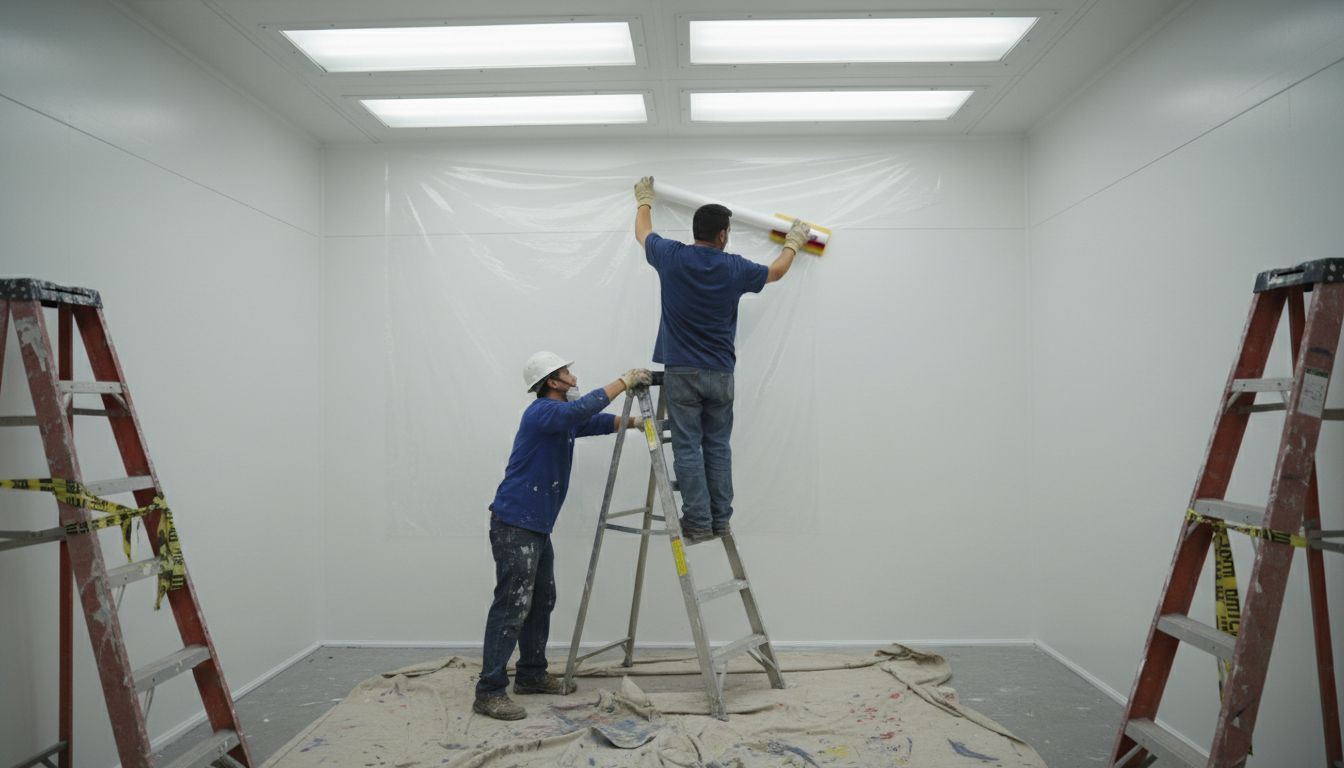
Étape 2 : Installez des films de protection contre la poussière haut de gamme sur les murs et les sols
C’est là que votre travail de préparation porte ses fruits. Installer correctement vos films de protection transforme votre cabine de pulvérisation en une zone sans contamination qui maintient des finitions cohérentes et de haute qualité. Le processus d’installation est simple lorsque vous avez des surfaces propres et que vous suivez une approche méthodique, mais précipiter cette étape ou sauter des détails entraînera des bulles, des plis et une adhérence faible qui compromettront tout votre système de contrôle de la poussière.
Commencez par vos murs, en commençant par le haut et en descendant. Déroulez votre film protecteur autocollant et placez-le le long du bord supérieur du mur de votre cabine. La plupart des films premium sont équipés d’un système de distributeur qui rend l’application presque facile, donc utilisez-le tel quel. Appuyez fermement sur la pellicule en descendant le long du mur, lissant les poches d’air avec une raclette en plastique ou votre main gantée. Travaillez en sections qui se chevauchent si votre cabine est large, en veillant à ce que chaque section soit bien liée avant de passer à la suivante. Faites une attention particulière aux coins et aux bords où la pellicule a tendance à se soulever. L’essentiel est d’appliquer une pression constante sans se presser. Vos mouvements doivent être délibérés et contrôlés. Une fois que vous avez couvert tous les murs, passez au sol. La protection des sols nécessite la même attention aux détails que les murs. Commencez par un coin et travaillez systématiquement sur le sol, en appuyant fermement sur la pellicule au fur et à mesure. Superposez les coutures d’au moins deux centimètres pour empêcher les débris de s’infiltrer en dessous. Si vous protégez une grande surface au sol, faites appel à une autre personne pour vous aider à tenir et positionner le film pendant que vous l’appliquez. Cela évite les plis et garantit que tout reste aligné pendant que vous travaillez dans l’espace.
Une fois l’installation terminée, inspectez toute votre cabine pour détecter d’éventuels bords lâches, bulles ou zones où le film n’a pas encore complètement adhéré. Un film protecteur correctement installé crée une barrière continue sans espaces ni points faibles. L’avantage d’une installation de qualité est que votre film reste en place pendant des mois d’utilisation intensive sans nécessiter d’entretien ou de réapplication constante. Une fois votre système de protection contre la poussière entièrement installé, votre cabine fonctionne à une efficacité maximale et vos finitions reflètent le travail irréprochable de votre équipe.
Astuce d’expert : Appliquez le film pendant la partie la plus fraîche de votre journée pour minimiser l’expansion liée à la chaleur, en assurant une adhérence plus serrée et en évitant le soulèvement des bords une fois que votre cabine chauffe pendant la production.
Étape 3 : Configurez le système de distributeurs électrostatiques pour l’efficacité
Votre système de distributeurs électrostatiques est le cœur de votre cabine de pulvérisation sans poussière. Faire cela signifie que vous obtiendrez une efficacité de transfert supérieure, minimisez le gaspillage de matériaux et livrerez des finitions conformes aux normes européennes de fabrication. Lorsqu’il est bien configuré, votre système électrostatique charge les particules de revêtement qui quittent le pistolet pulvérisateur, les faisant s’enrouler autour de votre pièce comme une force magnétique, au lieu de flotter autour de votre cabine sous forme de pulvérisation et de poussière.
Commencez par comprendre les capacités de tension de votre système et la mise à la terre. La plupart des systèmes électrostatiques professionnels fonctionnent à haute tension, et une mise à la terre appropriée est absolument cruciale pour un fonctionnement sûr et efficace. Vérifiez que votre cabine, votre pistolet pulvérisateur et votre pièce sont tous correctement mis à la terre conformément aux spécifications du fabricant de votre équipement. Ne sauter jamais cette étape ni supposer que la mise à la terre est déjà en place. Ensuite, optimisez vos réglages de pression d’air et de fluide pour équilibrer la qualité d’atomisation avec l’efficacité du transfert. La pression de l’air contrôle la finesse de l’atomisation de votre revêtement, tandis que la pression du fluide détermine le débit. Une pression d’air trop élevée crée un surpulvérisation et du brouillard excessifs, ce qui va à l’encontre de l’utilité de votre système électrostatique. Trop peu de pression d’air produit une mauvaise atomisation et des finitions inégales. Le bon équilibre dépend de la viscosité et de l’application de votre revêtement, donc commencez par la référence recommandée par votre fabricant et ajustez à partir de là. En ajustant ces réglages, surveillez les mesures de résistivité du revêtement pour garantir une charge électrostatique optimale. La résistivité du revêtement affecte directement la capacité des particules à charger et à transférer à votre pièce. Si la résistivité est trop faible, les particules ne se chargent pas adéquatement. Si c’est trop élevé, vous risquez un arc électrique et l’arrêt du système. Vous voudrez également configurer vos fonctions automatiques de limitation de courant si votre système les inclut. Cela protège votre équipement en empêchant les pics de tension dangereux tout en maintenant une charge constante selon les conditions de revêtement. Vérifiez aussi la configuration de la pointe de liquide et du bouchon d’air. Différentes combinaisons permettent une atomisation optimisée selon les types de revêtements et techniques d’application. Votre fournisseur d’équipement peut vous guider sur la combinaison qui convient le mieux à vos revêtements spécifiques et à vos besoins de production.
Les conditions environnementales à l’intérieur de votre stand comptent plus que la plupart des responsables d’installation ne le réalisent. La température, l’humidité et le mouvement de l’air influencent tous le fonctionnement de votre système électrostatique. Maintenez des conditions de cabine constantes en gérant soigneusement votre système de ventilation. La technique de l’opérateur joue également un rôle important dans l’efficacité du système. Formez vos techniciens en pulvérisation à la bonne distance, angle et vitesse pour maximiser l’efficacité du transfert et minimiser le gaspillage de matériaux. Une fois votre système configuré et votre équipe formée, vous constaterez des améliorations spectaculaires de la propreté, de la qualité des finitions et de l’efficacité des matériaux par rapport aux systèmes de pulvérisation conventionnels.
Astuce de pro : planifiez des contrôles hebdomadaires de résistivité et documentez vos résultats pour suivre la consistance des lots de revêtement et détecter les changements subtils avant qu’ils n’affectent la qualité de votre finition ou ne créent des problèmes de sécurité.
Étape 4 : Scellez les zones critiques pour maximiser le confinement de la poussière
Bien sceller votre cabine de pulvérisation est ce qui distingue un système de contrôle de la poussière médiocre d’un système qui offre réellement des résultats professionnels. Chaque fente, fissure et point d’entrée non scellé devient un passage pour que la contamination extérieure envahisse votre stand et se dépose sur des surfaces fraîchement peintes. Cette étape transforme votre stand d’une boîte poreuse en un environnement contrôlé qui maintient les conditions sans poussière requises par vos opérations de revêtement.
Commencez par identifier tous les points potentiels de fuite dans votre cabine. Parcourez tout le périmètre et faites très attention aux portes, fenêtres, panneaux d’accès, pénétrations de câbles et à toutes les interstices où les services publics traversent les murs ou les plafonds. Cherchez des interstices évidentes par lesquelles vous pouvez voir la lumière du jour, mais vérifiez aussi les petites fissures qui peuvent sembler insignifiantes jusqu’à ce que des particules de poussière commencent à s’y frayer un chemin. Les portes et les points d’accès nécessitent le plus d’attention car ils subissent des ouvertures et fermetures répétées, ce qui peut user les joints avec le temps. Installez ou améliorez les joints de porte et les joints d’étanchéité pour créer un joint hermétique lorsque les portes sont fermées. De nombreux gestionnaires d’établissement sous-estiment l’importance de bons joints de porte pour cabine de peinture et de joints lâches qui permettent la fuite d’air. Ensuite, traitez toutes les pénétrations des services publics et les entrées de câbles. Utilisez un mastic ou des scellants de haute qualité spécifiquement conçus pour les environnements de cabines de pulvérisation industrielles. Le mastic standard ne résistera pas aux fluctuations de température et à l’exposition chimique que votre cabine subit. Appliquez du mastic autour de tous les conduits électriques, conduites d’air, tuyaux de drainage et tout autre élément traversant les murs de votre cabine. Ne lésinez pas sur ce travail. Un tube de scellant industriel approprié coûte des sous comparé au coût d’une seule peinture contaminée.
Une fois les espaces structurels scellés, gérez stratégiquement les points d’accès de vos stands. Installez des tapis de contrôle de la contamination aux portes d’entrée qui retiennent les particules du passage piéton avant qu’elles ne se propagent sur le sol de votre stand. Envisagez de mettre en place une procédure d’entrée formelle où le personnel utilise ces tapis et peut même se changer pour des vêtements dédiés aux stands afin de minimiser l’introduction de contamination. Limitez la circulation piétonne lors des opérations de pulvérisation réelles autant que possible. Chaque personne entrant dans la cabine ajoute un risque de dégradation de poussière et de débris. Si quelqu’un doit entrer pendant les opérations, il doit se déplacer prudemment et éviter toute activité inutile. De plus, maintenez une pression d’air positive à l’intérieur de votre cabine en veillant à ce que votre système de filtration d’admission aspire un peu plus d’air que ce que votre système d’extraction retire. Cette subtile différence de pression force l’air à sortir lorsque les portes s’ouvrent, empêchant l’air extérieur de s’infiltrer et d’emporter la poussière avec lui. Vos filtres d’admission et d’extraction nécessitent un entretien régulier pour fonctionner efficacement, alors établissez un planning de nettoyage ou de remplacement en fonction de l’intensité d’utilisation de votre cabine. Nettoyez régulièrement les filtres pour maintenir l’écoulement de l’air et l’efficacité de la capture de poussière. Un filtre partiellement bouché travaille plus dur, restreint le flux d’air et compromet toute votre stratégie de confinement de la poussière.
Astuce professionnelle : notez les dates d’entretien de votre système de filtration sur un calendrier mural visible pour tous les opérateurs de cabine, et assignez à une personne la responsabilité hebdomadaire de l’inspection des filtres pour détecter les bouchons avant qu’ils n’affectent la performance de la contenance de la poussière de votre cabine.
Comparez les matériaux de scellement courants des cabines de pulvérisation et leurs avantages :
| Type | de matériau Durabilité | Résistance aux produits chimiques | Utilisation typique |
|---|---|---|---|
| Scellant de qualité industrielle | Haut | Excellente | Pénétrations de services publics, entrées de câbles |
| Joint de porte premium | Douleur moyenne | Bien | Portes, points d’accès |
| Coupe-froid | Douleur moyenne | Modéré | Fenêtres, petits espaces entre panneaux |
| Étui standard | Low | Pauvre | Réparations temporaires uniquement |
| Tapis de contrôle de la contamination | Haut | Non applicable | Entrées pour piéger la poussière |
Étape 5 : Vérifier des conditions sans poussière et une qualité de finition supérieure
Cette dernière étape de vérification distingue les établissements qui viennent d’installer une cabine de pulvérisation de ceux qui maîtrisent vraiment l’excellence du contrôle de la poussière. Vous avez préparé les surfaces, installé un film de protection, configuré votre système électrostatique et scellé les zones critiques. Vous devez maintenant vous assurer que tous vos travaux offrent réellement l’environnement sans poussière et la qualité de finition que votre opération exige. C’est là que vous mesurez le succès et identifiez les points faibles restants avant qu’ils ne compromettent votre production.
Commencez par effectuer une inspection visuelle de l’intérieur de votre stand pour détecter toute poussière, débris ou source de contamination évidente. Traversez la cabine lentement et délibérément, en regardant les murs, les sols, les coins et toutes les surfaces où votre film de protection est installé. Vérifiez s’il y a des déchirures, des bords de soulèvement ou des dommages au film qui pourraient laisser passer des contaminants. Examinez attentivement l’état de votre filtre. Même les nouveaux filtres peuvent présenter des défauts, et les anciens perdent progressivement leur efficacité. Cherchez des décolorations, des bouchons ou des accumulations de poussière visibles sur les surfaces des filtres. Si vos filtres semblent sales ou compromis, remplacez-les immédiatement. Ensuite, mesurez la vitesse de l’air et la performance de filtration de votre cabine à l’aide d’instruments appropriés. Les mesures de vitesse de l’air indiquent directement si votre cabine fonctionne selon les spécifications et maintient des flux d’air appropriés. La plupart des cabines de pulvérisation exigent des vitesses minimales de l’air sur les surfaces de travail, généralement mesurées en pieds par minute. Si votre flux d’air est en dessous des spécifications, vous ne capturez pas efficacement les particules de surpulvérisation et de poussière, ce qui annule toute votre stratégie de contrôle de la poussière. Utilisez des anémomètres calibrés ou d’autres équipements appropriés pour vérifier les performances. Documentez ces mesures et tenez des registres au fil du temps pour repérer les tendances avant qu’elles ne deviennent des problèmes.
Effectuer des opérations de pulvérisation d’essai pour évaluer la qualité réelle de la finition dans des conditions de production réelles. Pulvérisez un panneau d’essai ou une pièce d’échantillon avec votre revêtement standard et observez attentivement les résultats. Vérifiez l’absence de taches de poussière, de texture d’écorce d’orange ou d’autres défauts indiquant une contamination ou une mauvaise technique de pulvérisation. La finition doit paraître lisse, uniforme et exempte de particules incrustées. Si vous remarquez des défauts, vérifiez la source. Est-ce de la poussière dans la cabine, une mauvaise application du film qui crée de la texture, un étanchéité inadéquate permettant une contamination externe, ou des problèmes de technique de l’opérateur ? Une fois la cause identifiée, corrigez-la avant de reprendre la production complète. Établissez un calendrier de vérification de qualité de routine comprenant des inspections visuelles régulières, des contrôles de l’état des filtres, des mesures de débit d’air et des pulvérisations périodiques de test. Cette approche proactive détecte les problèmes tôt, lorsqu’ils sont les plus faciles et les moins coûteux à résoudre. Des finitions de haute qualité nécessitent des conditions constantes, et la cohérence ne vient que d’une vérification et d’un entretien systématiques. Votre conformité aux normes européennes de fabrication dépend de la documentation de ces procédures de vérification et de la tenue de dossiers démontrant que votre usine maintient des conditions sans poussière tout au long de la production.
Astuce de pro : créez une liste de vérification simple affichée près de l’entrée de votre stand que les opérateurs remplissent quotidiennement avant le début de la production, enregistrant l’état des filtres, la propreté visuelle et toutes les notes d’entretien afin de constituer un historique de performance protégeant vos standards de qualité.
Voici un résumé de chaque étape de contrôle de la poussière de la cabine de pulvérisation et de son objectif :
| Étape | Objectif | Bénéfice clé |
|---|---|---|
| 1. Préparation de surface | Éliminez les contaminants avant l’application du film | Maximise l’adhérence et la durabilité du film |
| 2. Installation de film | Appliquez des films de protection contre la poussière sur la cabine | Maintient des surfaces constamment propres |
| 3. Installation du système électrostatique | Optimiser le distributeur pour le transfert de revêtement | Réduit le surpulvérisation, améliore la qualité de la finition |
| 4. Scellement des zones critiques | Éliminez tous les points de fuite dans la cabine | Empêche l’entrée de contamination externe |
| 5. Vérification | Inspecter, mesurer et tester les conditions de la cabine d’essai | Garantit un environnement sans poussière, des finitions supérieures |
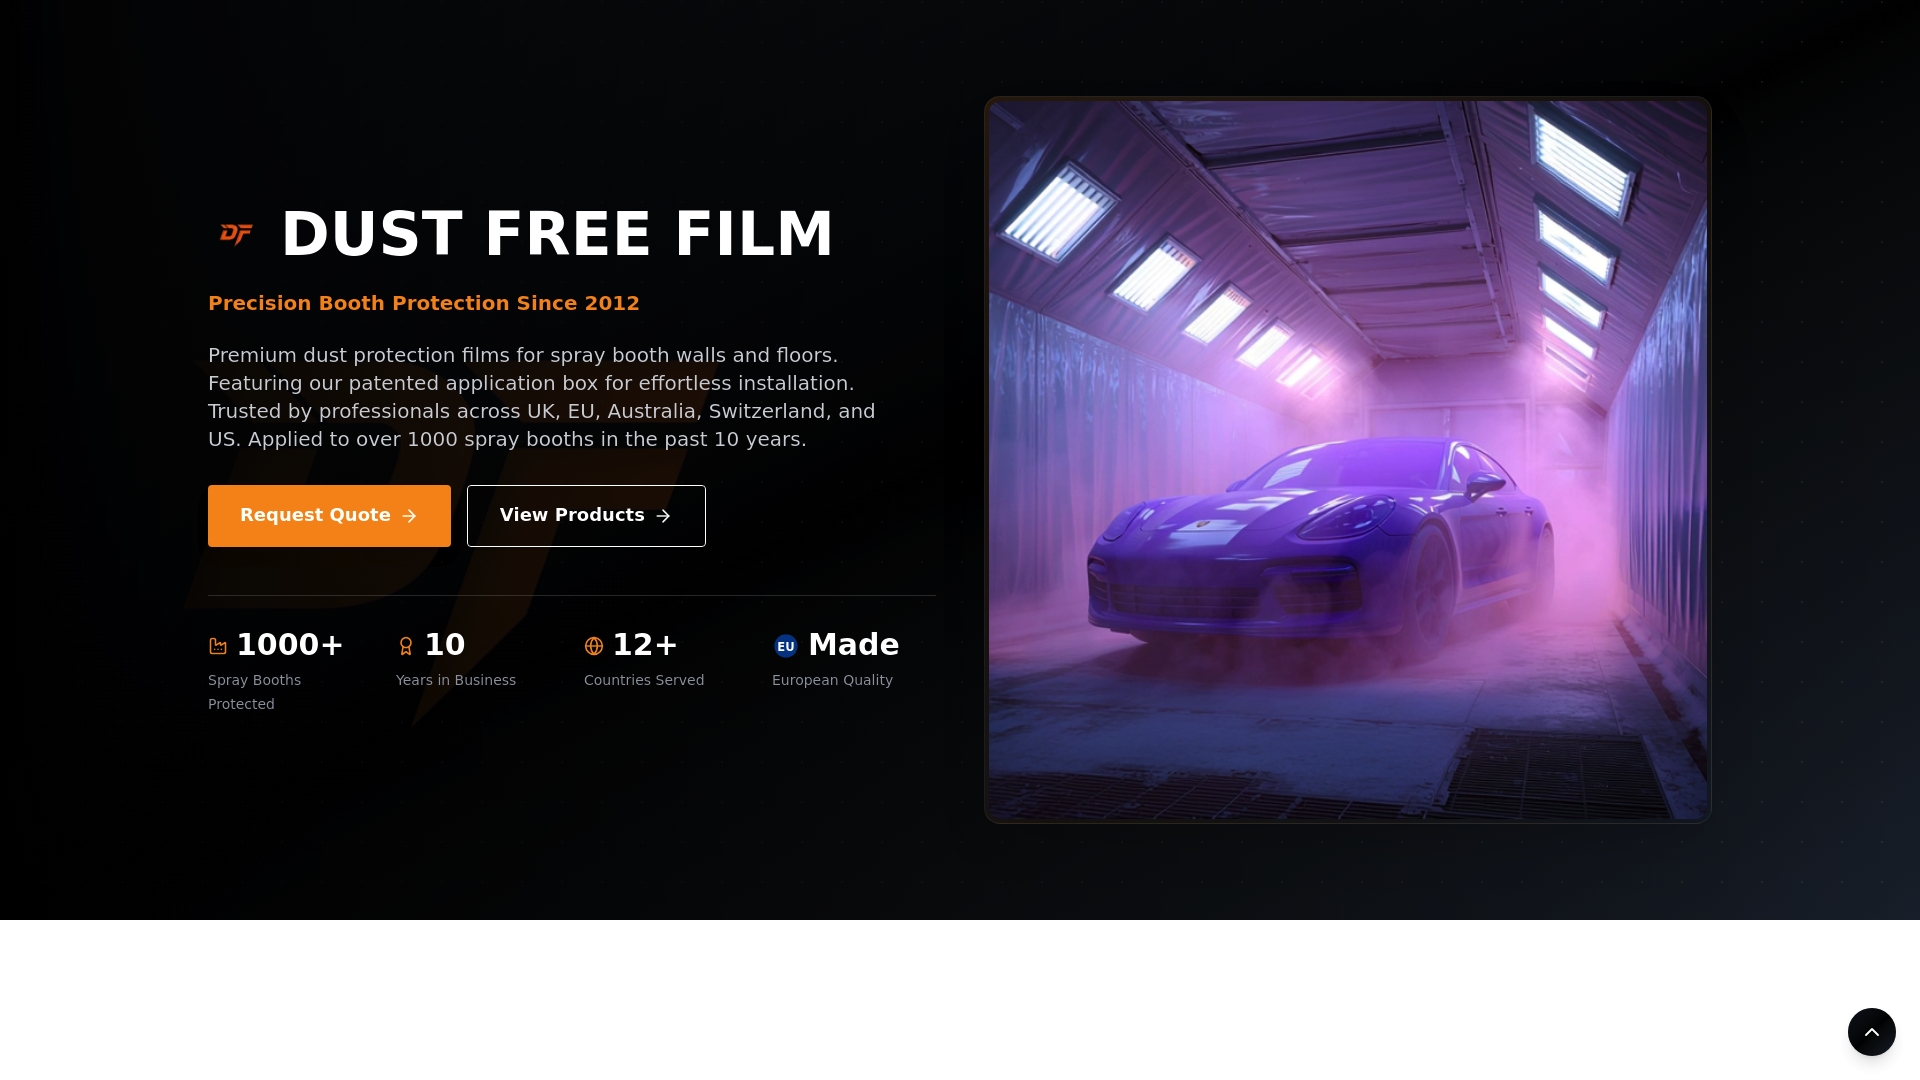
Obtenez des cabines de pulvérisation véritablement sans poussière avec des films de protection haut de gamme
Le défi de maintenir des conditions sans poussière dans les installations industrielles de cabines de pulvérisation est réel et coûteux. De la préparation des surfaces et l’application de films protecteurs à la fermeture des espaces critiques et à la vérification de la qualité de l’air, chaque détail compte. Si des fuites d’air, des débris ou une mauvaise adhérence compromettent l’environnement de votre cabine, vous risquez de ruiner les finitions et de gaspiller des matériaux. C’est pourquoi il est essentiel de choisir des solutions de haute qualité, conçues spécifiquement pour ces points de douleur.
Chez Dust Free Film, nous sommes spécialisés dans les films de protection contre la poussière haut de gamme, conçus pour des secteurs tels que la restauration automobile et la peinture industrielle. Nos films multicouches, résistants à la chaleur et sans statique, offrent une adhérence et une durabilité supérieures, parfaitement alignées avec les étapes de préparation et d’application décrites dans votre guide de montage de cabine de pulvérisation. Conçus pour une installation facile grâce à notre système de distributeur breveté, nos films créent une barrière constante contre la contamination qui soutient une décharge électrostatique optimisée et des flux d’air filtrés, essentiels aux performances de votre cabine.
Découvrez nos solutions avancées de protection contre la poussière et découvrez la différence que nos produits conçus par expertise font pour maintenir des cabines de pulvérisation plus propres et plus sûres. Ne laissez pas la poussière cachée saboter la qualité de votre finition. Investissez dès maintenant dans des systèmes de film fiables qui vous aident à respecter les normes de fabrication européennes élevées et à augmenter l’efficacité opérationnelle en toute confiance.
Découvrez dès aujourd’hui la technologie de protection de Dust Free Film et assurez-vous des finitions parfaites dès demain.
Questions fréquemment posées
Comment préparer les surfaces de ma cabine de pulvérisation pour l’application du film protecteur ?
Pour préparer les surfaces de votre cabine de pulvérisation, commencez par enlever tous les débris lâches, la poussière et la graisse. Utilisez un aspirateur avec un filtre fin suivi de chiffons propres ou de chiffons en microfibre pour vous assurer que les surfaces sont propres et sèches avant d’appliquer le film protecteur.
Quelle est la meilleure façon d’installer des films de protection contre la poussière sur les murs et les sols des cabines ?
Commencez à installer des films de protection contre la poussière sur les murs de haut en bas, en appuyant fermement pour éliminer les poches d’air. Lors de l’application sur le sol, superposez les joints d’au moins deux pouces pour empêcher les débris de passer en dessous ; Assurez-vous de travailler de manière systématique pour maintenir l’alignement et prévenir les rides.
Comment puis-je optimiser mon système de distributeurs électrostatiques pour un meilleur contrôle de la poussière ?
Pour optimiser votre système de distributeur électrostatique, assurez-vous que tous les composants sont correctement mis à la terre et ajustez les réglages de pression de l’air et du fluide pour une atomisation équilibrée. Vérifiez régulièrement les mesures de résistivité des revêtements afin de maintenir une efficacité optimale de charge et de transfert des particules.
Que dois-je surveiller lorsque je scelle les zones critiques dans ma cabine de peinture ?
Inspectez tous les points de fuite potentiels, en vous concentrant sur les portes, fenêtres et les passages de services publics. Utilisez des scellants de qualité industrielle pour combler les espaces et éviter la contamination, et installez des tapis de contrôle de la contamination aux points d’entrée pour réduire encore l’exposition à la poussière.
Comment puis-je vérifier que ma cabine de peinture maintient des conditions sans poussière ?
Effectuez régulièrement des inspections visuelles pour détecter la poussière et les débris, vérifiez l’état des filtres et mesurez la vitesse de l’air pour garantir un flux d’air optimal. Effectuez des opérations de pulvérisation d’essai pour détecter tout défaut de finition causé par la contamination, en effectuant les ajustements nécessaires pour maintenir des normes élevées.
Quel entretien régulier devrais-je mettre en place pour mon système de contrôle de la poussière ?
Établissez un programme d’entretien régulier comprenant des inspections hebdomadaires des filtres, des mesures du débit d’air et des contrôles quotidiens de propreté avant la production. Documenter ces procédures aidera à détecter les problèmes tôt et à garantir que votre système de contrôle de la poussière reste efficace.
Recommandé
- Film sans poussière pour la protection des cabines de pulvérisation | Mur et sol
- Film sans poussière pour la protection des cabines de pulvérisation | Mur et sol
- Film sans poussière pour la protection des cabines de pulvérisation | Mur et sol
- Film sans poussière pour la protection des cabines de pulvérisation | Mur et sol
- Comprendre l’amélioration de la qualité de l’air intérieur pour des espaces plus sains – Mats4U USA