

The fastest, most repeatable way to apply electrostatic dust-protection film in a spray booth is the wet (slip) method: mist the glass, float the film, and squeegee center-out with a rigid tool wrapped in a lint-free cloth. Done right, you get a dust-free, residue-free surface ready for production in one pass.
Here is the core sequence at a glance:
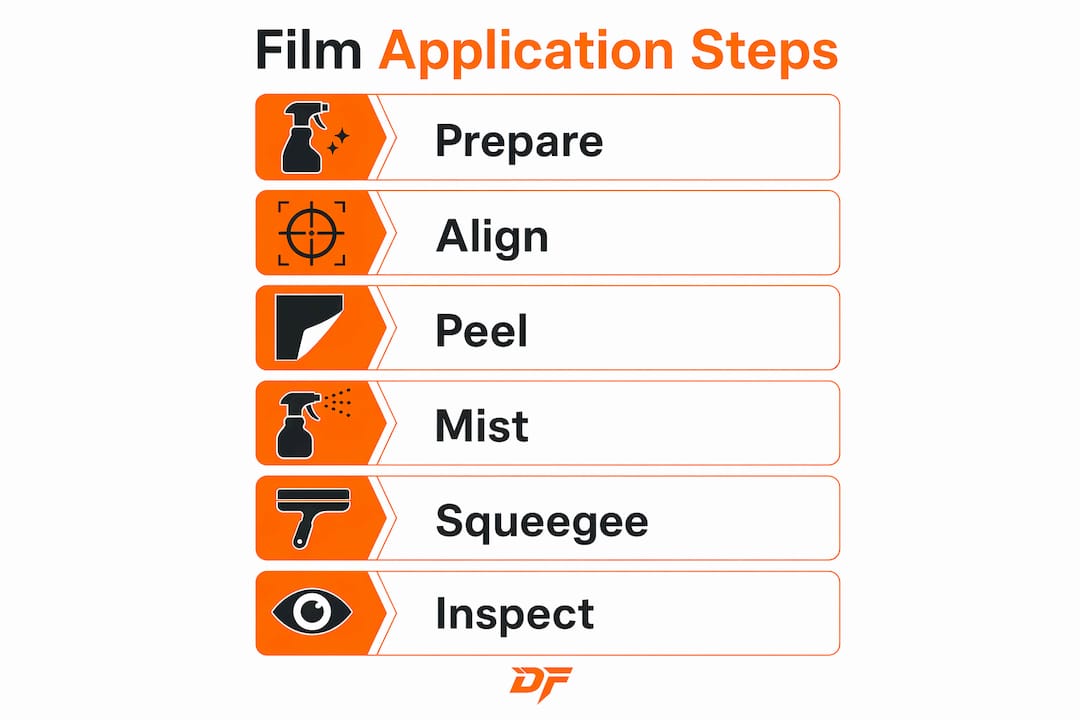
- Clean the substrate with glass cleaner and a razor scraper
- Mist the glass generously with slip solution (distilled water + 2–3 drops mild soap)
- Cut film oversized by roughly 1/8–1/4 inch per edge
- Peel the liner while misting the film face to neutralize static charge
- Float the film into position, top edge first
- Squeegee center-out with overlapping strokes, wiping the edge frequently
- Trim flush to the frame and inspect under strong light
That sequence is the foundation. Everything below is about executing it without rework.
Table of Contents
- What materials and tools do you need before entering the booth?
- Step by step electrostatic film application for spray booths
- How do you get a bubble-free finish and fix problems fast?
- How should you remove, store, and reuse electrostatic film?
- What booth controls prevent contamination during application?
- How long does application take, and what does it cost?
- Electrostatic vs. adhesive-backed film: which is right for your booth?
- Why Dustfreefilm is the practical choice for industrial spray booths
- Key Takeaways
- What operators get wrong about electrostatic film installs
- Dustfreefilm: samples, custom widths, and bulk orders
- Useful sources
What materials and tools do you need before entering the booth?
Arriving with the wrong kit wastes more time than any technique error. Stage everything on a clean cart outside the booth before you open the door.
Film and consumables:
- Dustfreefilm rolls sized for your panels, plus a spare liner and a rigid support tube or backing card to keep the film flat during transport
- Replacement blades for your utility knife and razor scraper — dull blades drag and tear
Slip solution:
Fill a clean spray bottle with distilled water and add 2–3 drops of a lotion-free mild dish soap. Distilled water matters in hard-water regions because mineral deposits leave spots under the film. Skip shop water unless you have confirmed it is soft and clean.
Application tools:
- Rigid squeegee wrapped in a fresh lint-free cloth (the cloth protects the film surface and traps grit so it does not scratch)
- Microfiber towels for final surface wipes
- Razor scraper with a fresh blade for contamination removal
- Utility knife, measuring tape, marker, and masking tape for temporary holds
PPE:
Disposable nitrile gloves, safety glasses, and closed-toe footwear. If your booth contains sensitive electronics or metallic fixtures with ESD ratings, ground yourself before handling film. The static charge on an ungrounded installer can attract dust to the film face during placement, which is exactly what you are trying to prevent.
Pro Tip: Keep your squeegee cloth and microfiber towels in a sealed bag until you are inside the booth. Any dust they pick up in transit goes straight under your film.
Step by step electrostatic film application for spray booths
Follow these steps in order. Each one has an acceptance check before you move forward.
-
Stage and time your entry. Set up your clean cart just outside the booth. If booth airflow can be safely paused or reduced, coordinate with your HVAC tech to do it during the application window. Airflow pulls airborne dust into the wet film-glass interface during those seconds the film is floating — sequencing around ventilation is as important as technique itself.
-
Clean the substrate. Spray glass cleaner on the panel and work a fresh razor scraper across the surface to lift any paint overspray, adhesive residue, or mineral deposits. Follow with a microfiber wipe. Acceptance check: run a clean fingertip across the glass — it should squeak, not drag.
-
Cut the film oversized. Unroll your Dustfreefilm roll onto a flat surface and cut each panel piece with 1/8–1/4 inch extra per edge. Use the support tube to keep the cut piece flat. Oversizing lets you trim in-place for a clean, flush edge rather than fighting alignment.
-
Prepare and apply slip solution. Fill your spray bottle and mist the glass generously. You want a visible wet film across the entire surface, not a light spritz. This is what lets the film slide into position without committing on contact.
-
Peel the liner while misting the film face. Misting the film side as you peel the liner neutralizes the static charge that would otherwise attract airborne contaminants during placement. For stubborn liners, use the tape-lever trick: press two pieces of tape end-to-end on opposite corners of the liner to create a mechanical lever that releases the backing without stressing the film.
-
Float and align. Position the top edge of the film against the top of the panel first, keeping the film wet so it slides freely. Do not let it touch the glass dry. Once the top edge is set, lower the film onto the surface and make one firm center stroke to anchor it.
-
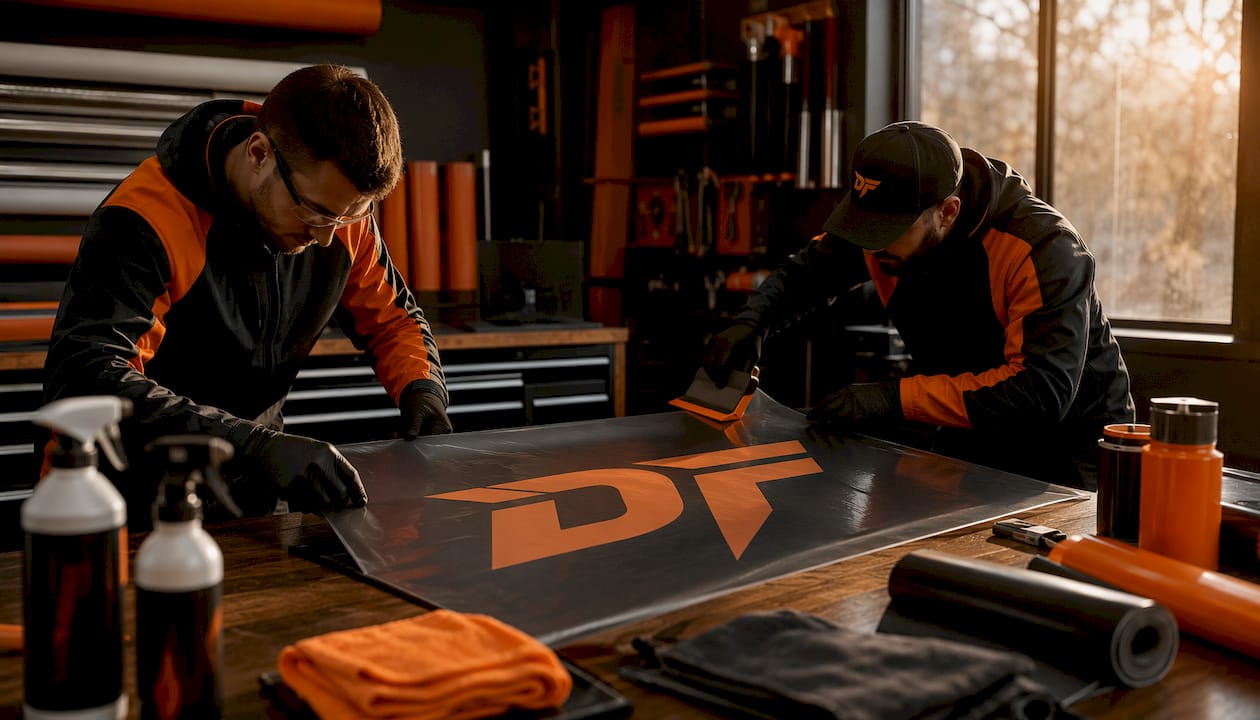
Squeegee technique. Start at the center and work outward with overlapping strokes that cover roughly half the prior pass width. Always guide trapped air and moisture toward the nearest edge, never compress it toward the center. Wipe the squeegee edge with a clean cloth after every two or three strokes to clear any grit that could scratch the film.
-
Trim and inspect. Trim flush to the frame with a sharp utility knife. Inspect under strong booth lighting for pinholes, dust specks, or micro-bubbles. If you find a problem, lift the nearest edge, re-mist the substrate, wipe it clean, and reapply. Do not accept a finish you would not paint over.
Two-person note: On panels wider than about 4 feet, assign one person as the “floater” (holds and aligns the film) and one as the “squeegee.” The floater keeps the film wet and positioned while the squeegee operator works without rushing. This role split cuts rework on large panels significantly.
Pro Tip: Pre-cut your film rolls for an entire shift before entering the booth. Cutting inside the booth introduces debris and extends the airflow-sensitive window unnecessarily.
How do you get a bubble-free finish and fix problems fast?
Bubbles and dust spots are the two failure modes that kill production time. Both are fixable if you catch them before the film dries.
Bubble-free technique:
- Overlapping center-out strokes are the core method. Each pass should cover about half the width of the previous one so no area is left unworked.
- Guide air and moisture to the nearest edge. Pressing down on a central bubble compresses it; guiding it out eliminates it.
- Keep the squeegee edge clean. A single grit particle dragged across the film leaves a scratch that reads as a defect under paint-booth lighting.
Common problems and fixes:
- Trapped dust speck: lift the nearest edge, re-mist the substrate, wipe with a clean microfiber, and reapply. Do not try to push a dust particle to an edge through the film.
- Micro-bubbles after squeegeeing: guide them to the edge with light strokes rather than pressing harder. Excess pressure can stretch the film.
- Curling edges: re-mist the edge and tuck it flat with a squeegee wrapped in a fresh cloth or a soft card.
Static and dust attraction:
Misting the film face during liner peel is the primary defense. If static persists after misting, a light application of anti-static spray on the film side can help — use it sparingly and follow the product’s safety data sheet for ventilation requirements inside a booth.
Do-not-do list: Never apply film dry. Never use soap with lotion or conditioner in the slip solution. Never force squeegee strokes that drag grit across the surface.
Pro Tip: Set your quality threshold before you start: minor micro-bubbles smaller than 1mm that sit away from the panel center are generally acceptable in production settings. Bubbles larger than that, or any dust speck in the primary spray zone, warrant a redo.
How should you remove, store, and reuse electrostatic film?
Electrostatic films can be re-applied multiple times when stored correctly, which directly reduces per-cycle cost.
- Removal: peel gently from one corner at a low angle. Roll the film onto a rigid support tube with the static side facing inward to protect it from contamination.
- Storage: store rolls in a dry, dust-free environment. Wrap the tube in a clean plastic sleeve and label it with the date and the panel location it came from for inventory control.
- Reuse inspection: before reapplying a stored piece, hold it up to strong light and check for contamination, tears, or film fatigue. A compromised piece costs more in rework than a fresh cut.
- Disposal: when a piece is worn beyond reuse, follow your facility’s polymer waste stream rules. Check whether your local recycling program accepts thin-film plastics before sending material to landfill.
A good spray booth maintenance workflow integrates film removal and storage into the regular cleaning cycle so nothing gets left on a surface past its useful life.
What booth controls prevent contamination during application?
Airflow is the variable most operators underestimate. Booth intake fans can pull dust into the wet film-glass interface during the seconds the film is being aligned, even in a well-maintained facility.
- Stage all tools outside the booth and wipe down the immediate work area before bringing anything in.
- Schedule application during low-airflow windows, or coordinate a temporary intake reduction with your HVAC tech if your safety plan allows it.
- Limit personnel movement inside the booth while the film is unset. Assign a single entry point and keep foot traffic to the two-person crew only.
- Run final inspection under booth lighting after a short drying period — trapped particulates that are invisible when wet become visible once the slip solution evaporates.
For a deeper look at environmental sequencing, the industrial spray booth setup guide covers ventilation coordination and contamination control in detail.
Statistic callout: Industry installers consistently identify airflow management as the single most impactful variable in booth film application quality — more so than squeegee technique or film brand.
How long does application take, and what does it cost?
Realistic planning numbers matter more than optimistic ones when you are scheduling a full-line rollout.
- Setup time: staging tools, mixing slip solution, and pre-cutting film for a shift typically runs 15–20 minutes for an experienced two-person crew.
- Per-panel application: a standard booth wall panel (roughly 4 × 8 feet) takes one person about 10–15 minutes from clean substrate to trimmed finish. A two-person crew cuts that to 6–8 minutes per panel on large surfaces.
- Cost drivers: labor skill level is the dominant variable. An experienced installer wastes less film, makes fewer redo passes, and trims cleaner. Film width and panel complexity (curves, fixtures, cutouts) are secondary drivers.
- Consumable cadence: replace squeegee cloths every 3–4 panels or whenever you feel grit. Replace utility knife blades every 8–10 cuts. Dull blades are the most common cause of ragged trim lines.
- Dispenser systems: Dustfreefilm’s patented dispenser eliminates the need for tape holds and speeds unrolling on large panels, which meaningfully reduces per-panel time on high-volume rollouts.
Planning note: Batching similar panel sizes and pre-cutting rolls before entering the booth are the two process changes that most consistently shrink per-panel time in production environments.
Electrostatic vs. adhesive-backed film: which is right for your booth?
The choice comes down to maintenance frequency and residue tolerance.
- Electrostatic film: no adhesive residue on removal, fully repositionable during application, and reusable across multiple cycles. The right choice for frequent maintenance cycles and temporary protection where labor cost on removal matters.
- Adhesive-backed film: stronger mechanical hold, better for high-abrasion areas or long-term installations where repositioning is not needed.
- Operational impact: adhesive removal requires solvents and increases labor exposure time. Electrostatic film supports faster, lower-cost refresh cycles — a decisive advantage in high-throughput booths where adhesive removal would eat into production time.
Electrostatic film also works as an interface layer between a smooth glass surface and temporary hardware mounts, protecting the substrate from adhesive residue when the mount is removed.
Why Dustfreefilm is the practical choice for industrial spray booths
Dustfreefilm has manufactured industrial electrostatic protective films since 2012, supplying auto body shops, industrial painting facilities, and manufacturing plants with multi-layer booth wall and floor protectors engineered for heat resistance and static-free performance.
Key operational advantages:
- Patented dispenser system for tape-free, fast deployment — no fumbling with tape holds on large panels
- Multi-layer construction for durability in high-traffic booth environments
- No residue on removal, supporting fast refresh cycles without solvent cleanup
- Custom widths and bulk configurations to match your panel dimensions and order volume
- Direct ordering via sample requests, custom quotes, or bulk purchase through the Dustfreefilm product page
For facilities running multiple booths or high weekly vehicle throughput, the dispenser system and custom-width rolls are the two features that most directly reduce per-panel labor time.
Key Takeaways
Wet application with a rigid squeegee and proper booth sequencing is the only method that delivers repeatable, production-grade results with electrostatic film.
| Point | Details |
|---|---|
| Use the wet (slip) method | Distilled water plus 2–3 drops of lotion-free soap lets film float and reposition before committing. |
| Squeegee center-out with overlapping strokes | Each pass should cover roughly half the prior pass width; guide air to the nearest edge, never compress it inward. |
| Control booth airflow during application | Intake fans can pull dust into the wet film interface; coordinate a low-airflow window before you start. |
| Store film on rigid tubes in dry conditions | Rolling static-side inward and labeling by date and location preserves reusability and cuts per-cycle cost. |
| Dustfreefilm for production rollouts | Patented dispenser system and custom-width multi-layer rolls reduce per-panel labor time in high-throughput booths. |
What operators get wrong about electrostatic film installs
The conventional wisdom in most installation guides focuses almost entirely on squeegee technique. That is not where most booth installs fail.
The real failure point is the 10 seconds between liner peel and the first squeegee stroke. That is when the film is charged, wet, and floating — and when airflow, an ungrounded installer, or a single dust particle on the substrate can ruin the job. Technique fixes a bad squeegee pass. Nothing fixes a dust speck bonded under a film that has already dried.
The second underestimated factor is slip-solution quality. Lotion-based soaps leave a film on the glass that prevents full contact. Hard tap water leaves mineral deposits. Neither shows up immediately, but both show up under paint-booth lighting after the job is done. Distilled water and a lotion-free soap are not optional upgrades — they are the baseline.
Dustfreefilm’s field experience since 2012 across automotive and industrial facilities consistently points to the same two fixes: mist the film face during liner peel, and sequence application around booth ventilation. Those two steps eliminate the majority of redo passes before technique even enters the picture.
Dustfreefilm: samples, custom widths, and bulk orders
Dustfreefilm supplies multi-layer electrostatic booth protectors direct to facility operators and procurement teams, with no minimum order required for samples. Custom-width rolls are available for non-standard panel dimensions, and bulk configurations come with dispenser accessories that cut deployment time on full-line rollouts. Whether you are piloting a single booth or outfitting a multi-bay facility, the ordering process starts with a quote or sample request at dustfreefilm.com. Contact the team directly to discuss custom configurations, volume pricing, or distributor arrangements for your operation.
Useful sources
- Dustfreefilm — protective film application guide for spray booths: the primary step-by-step install reference and product proof page; bookmark this for crew training.
- Dustfreefilm — company credentials and ordering: company background, product range, bulk ordering, and distributor contact.
- Bubble-free static film application — San Antonio Window Tint: field-validated squeegee technique and stroke pattern guidance from professional tinters.
- How to install removable tint without glue — PPF for Car: practical wet-method sequencing and trimming advice for automotive film applications.
- Electrostatic film installation guide — DecorImprime: surface prep, sizing, and reapplication notes for decorative and printed electrostatic films.
- How to apply electrostatic film to glass — Luminis Films: liner removal technique including the tape-lever trick for stubborn backings.
- Dustfreefilm — how to reduce dust in spray booths: dust-reduction tactics and sequencing for pre-application environmental controls.
This article provides general operational guidance for electrostatic film application. Always consult your film manufacturer’s datasheet and your facility’s safety plan for ESD, chemical handling, and ventilation requirements specific to your environment.