

TL;DR:
- Proper spray gun setup is crucial for achieving a flawless finish and minimizing defects in automotive painting.
- Adjusted parameters such as fluid flow, fan width, air pressure, and environment conditions directly impact the quality and efficiency of application.
Spray gun setup is the single biggest variable between a flawless finish and a panel that goes back for rework. Before the trigger is ever pulled, decisions about fluid flow, fan width, atomizing air pressure, gun distance, and stroke speed have already determined whether the job succeeds. Proper spray gun setup can eliminate a very large proportion of potential paint defects before application begins, cutting rework time and material waste significantly. The gun itself is almost secondary. A mediocre gun dialed in correctly will outperform an expensive one set up carelessly.
The core parameters that define every setup:
- Fluid flow (material knob): controls how much paint exits the tip per trigger pull
- Fan width (pattern adjustment): sets the spray cone size relative to the surface area
- Atomizing air pressure (at the air cap): determines how finely paint particles break apart
- Gun-to-surface distance: typically 6–8 inches for base coats
- Stroke speed: roughly 12 inches per second for consistent film build
- Overlap: 50–75% per pass to prevent thin spots and banding
Get all six right and defects like orange peel, runs, and dry spray largely disappear. Miss even one and the others can’t compensate.
Table of Contents
- 1. How to master the three main spray gun controls
- 2. How gun type changes your setup approach
- 3. Why paint viscosity and type demand setup adjustments
- 4. How spray booth conditions interact with your gun setup
- 5. Treating the spray gun as a precision system
- 6. How Dustfreefilm supports superior spray gun performance
- Key Takeaways
1. How to master the three main spray gun controls
The three controls on any spray gun — fluid flow, fan width, and atomizing air pressure — are interdependent. Change one and the other two need to move. Mastering these three controls requires adjusting for material viscosity and job requirements rather than relying on fixed presets, which is exactly where many painters go wrong.
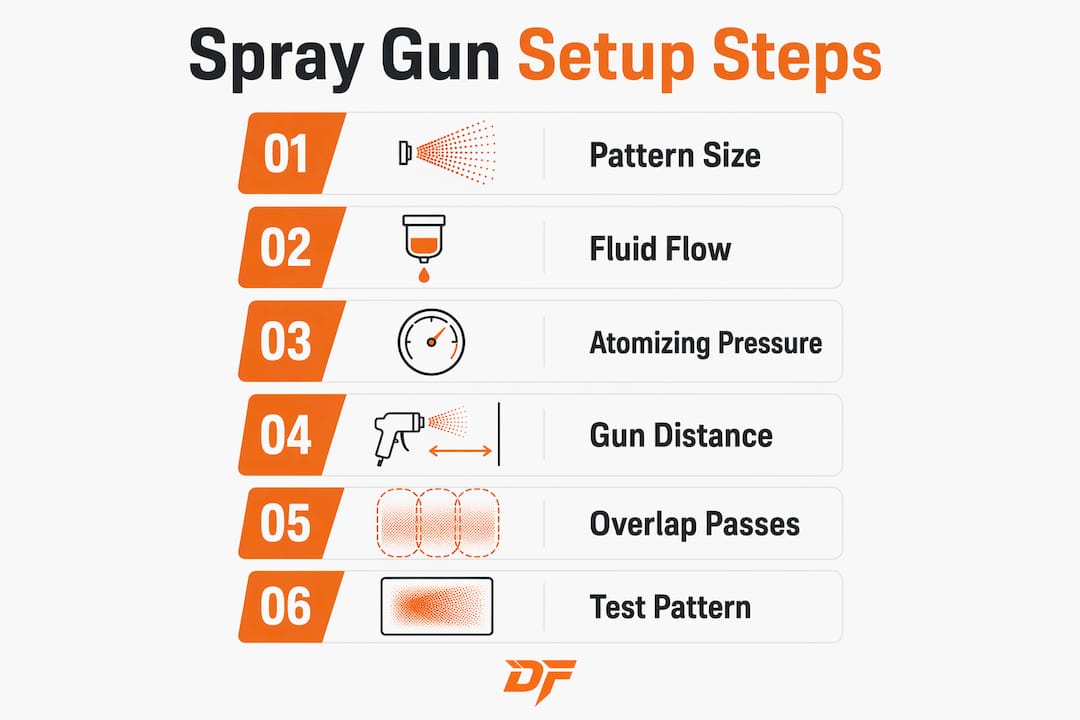
The correct adjustment sequence matters. Adjust pattern size first, fluid flow second, and then atomization pressure last to optimize transfer efficiency and reduce material waste. Opening the fan wide before dialing fluid flow creates an uneven, starved pattern. Chasing it with more pressure just adds overspray.
Pro Tip: Use an inline or cap-mounted pressure gauge and measure atomizing pressure with the trigger fully pulled. The reading at the wall regulator is not the reading at the air cap.
For gun-to-surface distance, 6–8 inches is the standard for base coats. Closer than that and you risk runs and heavy build-up. Farther and the paint dries before it lands, producing a rough, sandy texture. Stroke speed around 12 inches per second keeps film build even without flooding the surface.
Overlap each pass by a significant margin. With a standard fan pattern, start the next pass suitably overlapping the previous one. Always trigger the gun before the stroke begins and release just after it ends — that habit alone eliminates the heavy edges and thin centers that plague inconsistent painters.
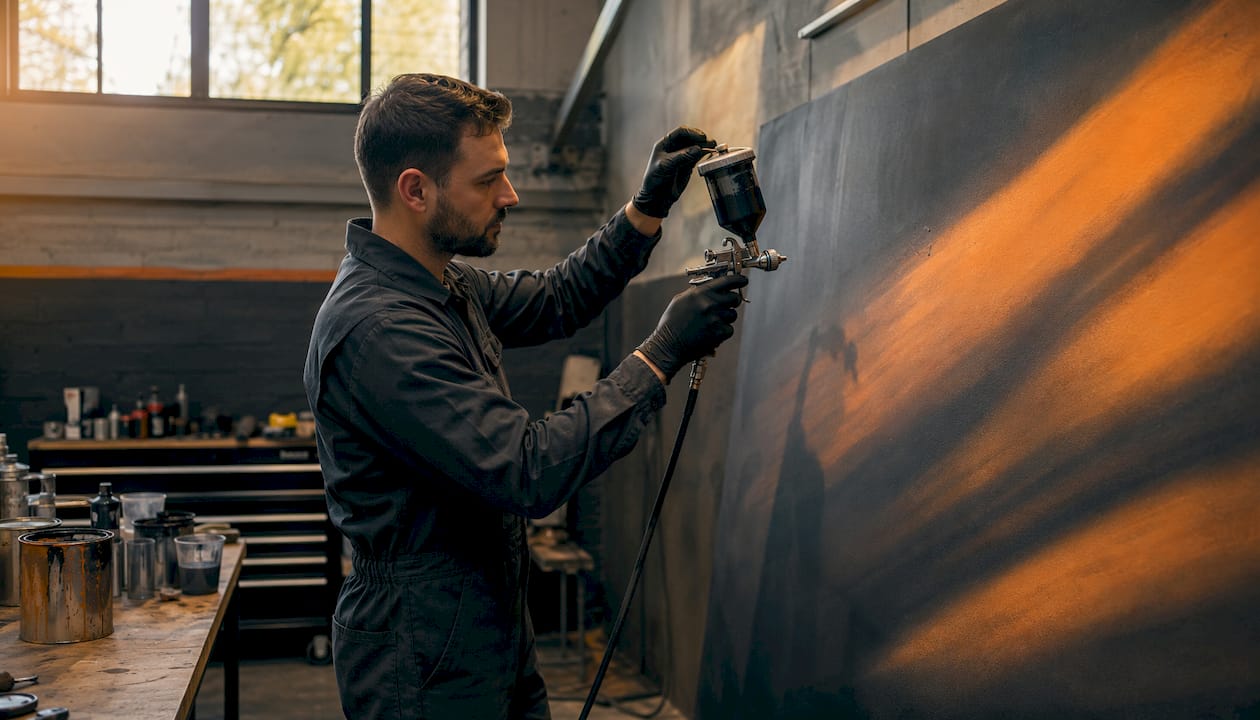
Test your pattern on masking paper before touching the panel. A well-atomized, even oval with no heavy tails or split centers tells you the setup is ready. Anything else means an adjustment is needed, not a second coat.
2. How gun type changes your setup approach
HVLP (High Volume Low Pressure) guns are the dominant choice in automotive refinishing because they deliver transfer efficiency up to 65%, meaning more paint reaches the surface and less becomes overspray. That efficiency depends heavily on painter skill and booth conditions, not just the gun itself. HVLP guns at 29 PSI inlet pressure consume roughly 12–15 CFM, so compressor capacity must be adequate to hold stable pressure throughout a panel.
LVLP (Low Volume Low Pressure) guns operate at lower CFM requirements, making them practical for smaller compressors, but they sacrifice some atomization quality on heavier materials. Conventional high-pressure guns atomize aggressively and suit fast-moving industrial applications, but transfer efficiency drops and overspray climbs. Each type requires a different pressure baseline and fluid tip selection.
Needle and nozzle size must match the material. A large tip on a thin waterborne base coat floods the surface. A small tip on a high-solids clear coat restricts output and forces excessive pressure to compensate. Match the tip to the viscosity, not to habit.
3. Why paint viscosity and type demand setup adjustments
Water-based coatings and solvent-based coatings behave differently at the air cap, and treating them the same is a reliable way to produce defects. Waterborne base coats are thinner and more sensitive to air pressure. Too much atomizing pressure on a waterborne material creates excessive misting and poor metallic orientation. Solvent-based materials tolerate higher pressures but require careful fluid flow control to avoid runs on vertical surfaces.
Temperature thickens or thins material before it even reaches the gun. Cooler shop conditions increase viscosity; warmer conditions reduce it. Measure viscosity with a calibrated viscosity cup before every session and adjust fluid flow accordingly. Following the manufacturer’s mixing ratio precisely reduces strain on the gun’s internal components and keeps atomization consistent.
Clearcoats, primers, and single-stage urethanes each have their own viscosity range and tip size recommendation. Switching between them without rechecking setup is one of the most common sources of finish defects in busy shops.
4. How spray booth conditions interact with your gun setup
Even a perfectly calibrated gun underperforms in a poorly controlled booth. Temperature and airflow affect solvent evaporation rates and air currents around the spray pattern, directly influencing how paint particles land and flow out. A booth running too cold slows solvent release and traps solvents in the film. Too warm and the material flashes before it can flow, producing texture.
Consistent, stable airflow is not just a comfort feature. It keeps overspray moving away from the panel and prevents contamination from settling into wet paint. Spray booth airflow and temperature interact directly with atomization behavior, meaning a gun dialed in perfectly at 70°F may need pressure and fluid adjustments at 55°F.
Dust is the other variable. Airborne particles that settle into wet clearcoat require sanding and repolishing, erasing the time saved by a good setup. Maintaining a clean booth environment is not separate from spray gun calibration — it protects the calibration investment on every job.
Pro Tip: Monitor booth temperature and airflow before each session. A 10°F drop can change material viscosity enough to require a fluid flow adjustment.
5. Treating the spray gun as a precision system
A spray gun is not a tool you set once and forget. Pressure losses through hoses, fittings, and the gun body typically account for an 8–15 PSI drop between the wall regulator and the actual atomizing pressure at the air cap. That gap means the pressure you think you’re running and the pressure doing the work are different numbers. Measure at the cap with the trigger pulled.
Tip and needle wear progressively degrades fan shape and consistency. The pattern narrows, material delivery increases unevenly, and defects like orange peel and runs appear. Most painters blame pressure settings. The real cause is a worn tip that should have been replaced two jobs ago.
Spray gun setup errors increase overspray and material consumption beyond the visible finish defects. That means higher paint costs, longer booth time, and more labor on every panel that comes back for correction. Operator technique — steady gun angle, consistent speed, and disciplined overlap — influences transfer efficiency as much as the mechanical setup does, sometimes more.
Pro Tip: Build a pre-job checklist: verify tip condition, measure cap pressure with trigger pulled, test pattern on paper, confirm viscosity. Five minutes of calibration prevents an hour of rework.
6. How Dustfreefilm supports superior spray gun performance
The spray gun setup is only as reliable as the environment it operates in. Dustfreefilm has specialized in spray booth dust protection since 2012, and the connection between booth cleanliness and gun performance is direct: airborne contamination that settles into wet paint undoes precise calibration instantly.
Dustfreefilm’s multi-layer electrostatic booth wall and floor protectors maintain cleaner spray environments, reducing contamination and improving paint finishes. The films are heat-resistant and static-free, which matters because static charge on booth surfaces actively attracts dust particles toward the wet panel. Eliminating that attraction source keeps the environment stable between gun passes.
The patented dispenser system allows fast, tape-free installation with no bubbles, so booth preparation doesn’t become a bottleneck before a job. For high-throughput automotive shops and industrial facilities, that speed translates directly to more productive booth time.
- Multi-layer construction provides durable, long-lasting protection across high-traffic environments
- Electrostatic properties prevent dust attraction to booth walls and floors
- Heat resistance keeps films stable under the elevated temperatures of baking cycles
- Custom configurations and bulk ordering support facilities of any scale
Integrating booth dust protection with precise spray gun calibration is the combination that consistently produces professional-grade finishes. One without the other leaves a gap that shows up in the paint.
Pro Tip: Incorporate Dustfreefilm protective films as part of your booth preparation routine. A clean, static-free surface environment lets your spray gun calibration work exactly as intended, every time.
Key Takeaways
Proper spray gun setup controls atomization, film build, and coverage uniformity, and no amount of operator skill compensates for a gun that was never correctly calibrated to the material and environment.
| Point | Details |
|---|---|
| Adjustment sequence matters | Set fan width first, fluid flow second, atomizing pressure last to maximize transfer efficiency. |
| Measure pressure at the cap | There is a measurable pressure drop between wall regulator and air cap, so static readings are unreliable. |
| Overlap every pass | Overlap passes by 50–75% (typically 3–6 inches with a 12-inch fan pattern) to ensure even coverage. |
| Replace worn tips proactively | Tip wear adversely affects fan shape and delivery, causing defects often blamed on pressure. |
| Booth environment protects calibration | Stable temperature, airflow, and dust control are prerequisites for consistent spray gun performance. |