

TL;DR:
- Surface preparation, including cleaning and sanding, is crucial for achieving a smooth and durable paint finish. Proper primer use, thin coats, and correct technique prevent common defects like flashing and lap marks, ensuring a flawless surface. Maintaining a dust-free environment and using the right tools further enhance the overall quality of the painted surface.
Paint finish quality is defined as the uniformity, smoothness, and durability of a painted surface. Achieving it depends far more on technique and preparation than on the paint brand you buy. Whether you’re rolling a bedroom wall or spraying a cabinet, the same core tips for paint finish quality apply: thorough surface prep, proper primer use, thin coats, and a disciplined approach to each step. Skip any one of these, and you’ll see the evidence in flashing, lap marks, or a rough texture that no second coat will fix.
1. How does surface preparation affect paint finish quality?
Surface preparation is the single biggest factor in how your final coat looks. Slow, deliberate prep saves time by eliminating the need for touch-ups and extra coats later. That means cleaning the surface, filling holes, sanding rough areas, and removing dust before you open a can of paint.
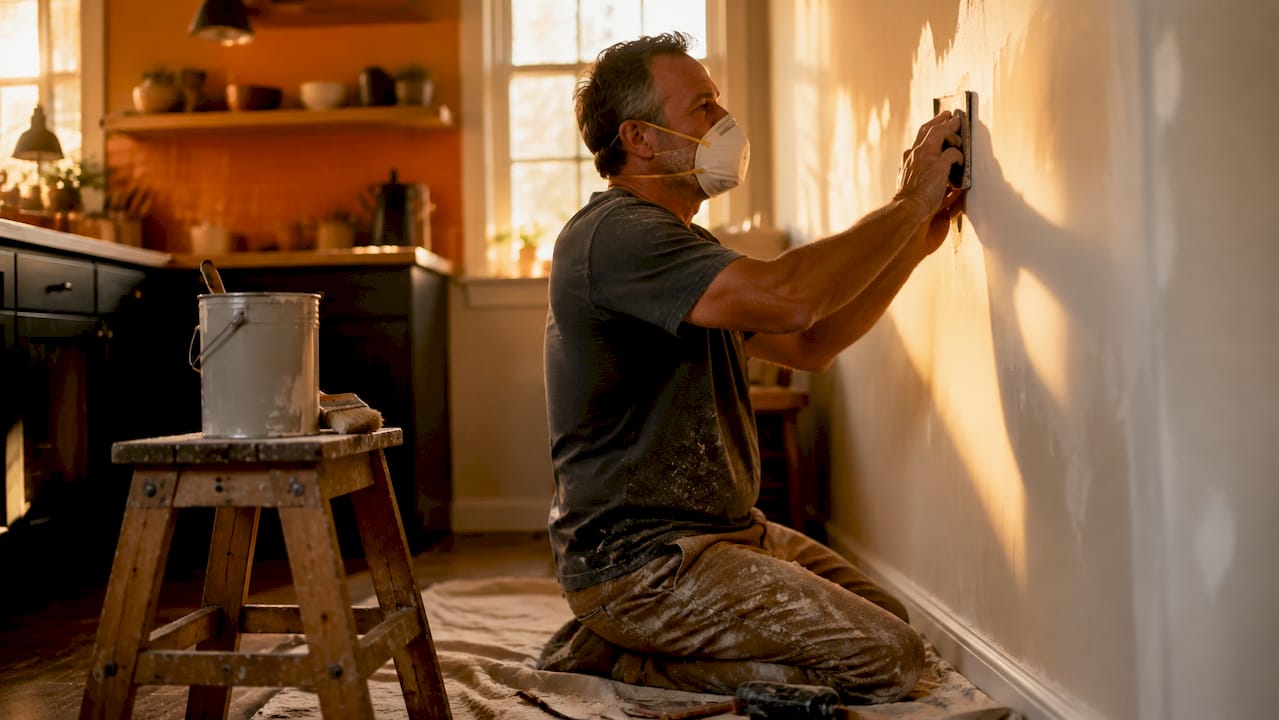
Dust and grease are the two most common contaminants that cause adhesion failure. Wipe walls with a damp cloth or a TSP (trisodium phosphate) solution before you do anything else. Any residue left behind will show through your topcoat.
Sanding serves two purposes: it smooths out imperfections and gives the surface a slight tooth for the paint to grip. Use 120-grit sandpaper for most interior walls, then wipe away all dust with a tack cloth. Skipping this step is one of the most common painting mistakes professionals see.
Pro Tip: After filling holes with spackling compound, sand the patch flush and feather the edges outward by at least two inches. A patch that feels smooth to the touch can still show as a bump under raking light.
- Clean with TSP or a degreaser before sanding
- Fill cracks and holes with the appropriate filler for the substrate
- Sand with 120-grit, then wipe with a tack cloth
- Check the surface under a raking light to catch missed imperfections
2. Why primer is non-negotiable for a smooth finish
Skipping primer on bare drywall or significant repairs causes flashing and uneven sheen even after multiple topcoats. Primer seals the surface and creates consistent absorption so your paint color reads the same across the entire wall.
New plaster is especially porous. A mist coat, mixed at a ratio of 10 parts paint to 1 part water, seals the surface without trapping moisture. Apply it thinly and let it cure fully before adding any topcoat.
Spot priming repairs and porous areas can prevent flashing without requiring you to prime the entire wall, as long as the surrounding surface is sound. For walls with large color changes or new plaster throughout, a full tinted primer coat is the correct call. Tinting the primer close to your topcoat color reduces the number of finish coats you need.
3. What are the best painting techniques to avoid common finish defects?
Technique controls whether your finish looks professional or amateurish. Uniform color, even sheen, and sharp transitions define a professional paint finish more than paint product quality alone. Discipline in technique and adherence to drying times produce better long-term results.
- Maintain a wet edge. Paint in 3x3 foot sections and overlap each new section into the wet edge of the previous one. This prevents the dried edge from creating a visible line.
- Use W or M patterns with your roller. Load the roller, apply paint in a W or M shape, then fill it in with parallel strokes. Finish each section with light, long vertical strokes from top to bottom.
- Feather brush strokes at edges. When cutting in with a brush, feather the stroke out toward the center of the wall so the brush mark blends into the rolled area.
- Apply multiple thin coats. Thin layers dry faster, reduce sagging, and are less prone to trapping air bubbles that cause rough texture. Three thin coats outperform one thick coat every time.
- Respect drying times. Applying a second coat before the first is fully dry causes lifting, streaking, and poor bonding. Check the manufacturer’s recoat window and add time in humid conditions.
Pro Tip: Roll your final coat in one consistent direction, top to bottom, across the entire wall. This unifies the sheen and eliminates the cross-hatch texture that shows up under certain lighting.
4. Which tools and materials optimize high-quality paint finishes?
The right tools make technique easier to execute correctly. A 9-inch roller with appropriate nap length provides a uniform finish and hides minor surface variations. Use a short nap (3/16 to 1/4 inch) for smooth walls and a longer nap (3/8 to 1/2 inch) for textured surfaces.
Brush quality matters at edges and cut-in areas. A cheap brush holds less paint, releases it unevenly, and leaves visible bristle marks. A high-quality synthetic brush with flagged tips holds more paint and releases it smoothly.
Straining paint through a fine-mesh filter eliminates small particles that cause nibs and fisheyes in the finish. This step takes 90 seconds and prevents defects that take 20 minutes to fix. Professional painters do it every time, even with fresh paint from a new can.
- Roller: 9-inch frame with the correct nap for your surface texture
- Brush: High-quality synthetic, 2.5 to 3 inches wide for walls
- Paint strainer: Fine-mesh cone strainer for every pour
- Tack cloth: Final wipe before painting to remove residual dust
- Practice wall: Test your roller pressure and technique on a scrap board before starting the main surface
For automotive and industrial painters, surface preparation for car paint follows the same logic. Clean, sand, prime, and strain your material before it ever touches the surface.
5. How to address common painting mistakes that reduce finish quality
Most finish defects are predictable and preventable. Thick coats are the most common beginner error. Thick coats trap air bubbles and increase sagging risks. The misconception is that more paint means better coverage. Professionals know the opposite is true.
Poor lighting is a mistake that compounds every other error. Paint under bright, raking light so you can see roller lines, missed spots, and sheen inconsistencies while the paint is still wet. Fixing them wet takes seconds. Fixing them dry takes hours.
- Sagging and runs: Caused by applying too much paint in one pass. Brush out runs immediately with a dry brush, feathering the edges.
- Flashing: Uneven sheen caused by inconsistent absorption. Fix with spot priming and an additional topcoat over the affected area.
- Lap marks: Caused by painting over a dried edge. Maintain a wet edge and work in smaller sections to prevent them.
- Brush marks: Caused by overworking paint that has started to set. Apply paint and leave it. Do not go back over an area once it begins to tack up.
- Roller texture: Caused by using the wrong nap or applying too much pressure. Use the correct nap and let the roller do the work with light, even pressure.
6. What advanced finishing steps help maintain and elevate paint quality?
Light sanding between coats is the step most DIY painters skip and most professionals never skip. Use 220-grit sandpaper to knock down any nibs or raised grain after the first coat dries. Wipe with a tack cloth, then apply the next coat. The result is a noticeably smoother surface.
Advanced finishing involves sanding between coats and maintaining proper environmental conditions to ensure bonding and surface integrity. Temperature and humidity directly affect how paint flows, levels, and cures. Paint applied below 50°F or above 90°F, or in humidity above 85%, is prone to poor adhesion and uneven sheen.
Pro Tip: Paint in the morning when temperatures are stable and humidity is lower. Avoid painting in direct sunlight, which causes the surface to dry too fast and prevents proper leveling.
- Sand between coats with 220-grit and tack cloth before recoating
- Keep ambient temperature between 50°F and 85°F during application and drying
- Fix drips and runs immediately by feathering them out with a dry brush
- Use a dust-free environment wherever possible to prevent contamination during drying
Dustfreefilm’s booth protection films address the contamination problem directly. Dust settling into wet paint is one of the hardest defects to prevent in open environments. A dust-free painting setup eliminates that variable entirely, which is why professional spray booths use electrostatic protection films on walls and floors.
Key Takeaways
Achieving a high-quality paint finish requires surface preparation, correct primer use, multiple thin coats, proper tools, and controlled environmental conditions working together.
| Point | Details |
|---|---|
| Prep before everything | Clean, fill, and sand every surface before priming or painting to prevent defects. |
| Primer prevents flashing | Apply primer to bare surfaces and repairs to create consistent absorption across the wall. |
| Thin coats outperform thick ones | Three thin coats dry faster, bond better, and resist sagging compared to one heavy coat. |
| Tools determine technique | Use the correct roller nap, a quality brush, and strained paint to eliminate surface defects. |
| Environment affects the finish | Paint between 50°F and 85°F with humidity below 85% to ensure proper leveling and adhesion. |
The discipline gap: what separates good finishes from great ones
Every painter I’ve worked alongside who consistently delivers flawless results shares one trait: they treat prep as the job, not the warm-up. The actual painting is almost anticlimactic once the surface is right.
The temptation to rush is real. You have paint, you have a brush, the wall is right there. But the painters who skip the tack cloth wipe or apply a second coat an hour early are the same ones spending twice as long fixing problems the next day. “Slow is fast” is not a motivational phrase. It is a description of how professional finishing actually works.
What I’ve also noticed is that most finish failures happen at transitions: where the brush meets the roller, where one coat meets the next, where a patched area meets the original surface. Those transitions require more attention, not less. Feather your edges. Spot prime your repairs. Sand between coats. The finish lives or dies at those seams.
The other thing worth saying plainly: your environment matters as much as your technique. Dust settling into wet paint undoes careful work in minutes. Controlling the air around your work surface is not a luxury for industrial painters. It is a basic condition for a clean finish. Whether you are working in a spray booth or a spare bedroom, reducing airborne contamination during drying is one of the highest-return steps you can take.
— Dust
Dustfreefilm and the dust-free finish advantage
A clean environment is the foundation every other finishing technique depends on. Dustfreefilm has manufactured premium dust protection films for spray booths since 2012, helping automotive refinishers and industrial painters eliminate airborne contamination before it reaches wet paint.

Dustfreefilm’s multi-layer electrostatic booth wall and floor protectors install quickly without bubbles, resist heat, and stay static-free throughout the painting process. For painters who want to apply every technique in this guide without losing the result to a speck of dust, booth protection films are the practical solution. Explore Dustfreefilm’s full range of dust control products to protect your next project from the ground up.
FAQ
What is the most important step for a smooth paint finish?
Surface preparation is the most critical step. Cleaning, filling, and sanding the surface before priming prevents the majority of finish defects, including flashing, rough texture, and poor adhesion.
How many coats of paint do professionals apply?
Professionals typically apply two to three thin topcoats over a primed surface. Multiple thin coats bond better and resist sagging compared to a single heavy coat.
How do you fix flashing in a paint finish?
Flashing is caused by uneven absorption. Spot prime the affected area, let it dry fully, then apply an additional topcoat. For large areas, a full tinted primer coat followed by two finish coats corrects the problem.
What causes lap marks and how do you prevent them?
Lap marks form when you paint over a section that has already dried. Prevent them by maintaining a wet edge, working in manageable sections, and finishing each section with light vertical strokes before moving on.
Does gloss level affect how durable a paint finish is?
Higher-gloss finishes are generally more durable and easier to clean than flat or matte finishes. For long-lasting gloss retention, proper surface prep and thin coats are the two most important factors regardless of sheen level.