

Floor film peeling almost always comes down to one thing: a mismatch between the adhesive, the booth environment, and how the film was applied or removed. If lifting is happening right now, stop foot and cart traffic over that section, keep the area dry and at a steady temperature, and try a slow 90° peel test on a small patch rather than yanking a full sheet. That single test tells you whether you’re dealing with an environmental problem or a technique problem, and it buys you time before you commit to a bulk reorder.
TL;DR:
- Proper testing of samples on your specific floor under real bake conditions helps prevent costly peel failures caused by mismatched film specifications.
- Peeling at a 90° angle with slow, steady pull ensures a cleaner separation and minimizes residue or tearing issues compared to shallow or rushed pulls.
- Contamination, inadequate surface curing, and environmental factors like UV exposure or high humidity are common causes of early film lifting and should be controlled during application.
- Using a thicker, temperature-rated film and sealing edges properly can significantly reduce early failure risks in high-traffic or high-heat spray booths.
- Addressing peel and adhesion problems quickly through spot fixes and proper removal techniques prevents small issues from spreading into larger film failures.
Table of Contents
- What Causes Floor Film Peeling in Spray Booths
- How to Peel Floor Film Safely: Angle, Speed, and Tools
- Prepping Floors and Applying Film So It Stays Put
- Diagnosing and Fixing Common Floor Film Problems
- A Manufacturer’s View on Preventing Floor Film Failures
- Get Floor Protector Samples and Bulk Pricing
- Sources
- FAQ
What Causes Floor Film Peeling in Spray Booths
Adhesive is a chemical system, not a static glue line, and it behaves differently depending on how long it sits and how hot the booth gets. Extended dwell time under repeated bake cycles ages the adhesive, and heat softens the bond just enough that vibration or foot traffic works an edge loose. Cold does the opposite: it stiffens the adhesive layer, making it brittle and prone to cracking at the seams instead of stretching with the floor.
Contamination is the other half of the problem. Dust, overspray residue, oil, or uncured coating on the substrate creates a barrier between the adhesive and the floor before the film ever gets a chance to bond properly. Strippable coatings and protective films exist specifically to trap that overspray, but they only work if the surface underneath was clean when the film went down.
Application mistakes compound both issues. Wrinkles, trapped air pockets, and sloppy edge sealing all create weak points where peeling starts, and it spreads from there. Most film failures trace back to a short list of causes:
- Wrong adhesion level for the substrate (too aggressive or too weak)
- Incorrect thickness for the traffic and load the floor sees
- Dirty or contaminated surface at the time of application
- Exposure to sun, outdoor humidity swings, or unshielded UV
- Skipping sample testing before a bulk order
Most protective-film problems trace back to those five variables, and testing on the actual floor before ordering pallets of film is the cheapest insurance you can buy. Applying over a floor that isn’t fully cured or that still holds moisture is one of the most common culprits, since damp or uncured substrates trap moisture under the film and set up lifting from day one.
Pro Tip: Run a coin-sized flashlight check across a fresh coating before laying film. If light reflects unevenly or the surface feels tacky rather than firm, it hasn’t cured enough to trust.
How to Peel Floor Film Safely: Angle, Speed, and Tools
The angle you peel at matters more than most crews realize. Pulling film back at 90° concentrates the separating force right at the bond line, so it releases cleanly without dragging adhesive across the floor. A 180° flat-back peel, where you fold the film all the way back on itself, pulls at a shallow angle that smears softened adhesive and increases the odds of tearing. A slow, steady 90° peel is the standard recommendation for exactly that reason.
Follow this sequence for a clean pull:
- Start at a corner, never the middle of a run, so you control the tear direction from the outset.
- Peel slowly and steadily. Rushing tears the film and leaves adhesive fragments behind.
- Let the floor equilibrate after a hot bake cycle. Giving the surface time to cool before you peel reduces smear and carrier tearing, since heat-softened adhesive behaves unpredictably.
- Use a low-angle plastic scraper on any stubborn corner, never metal, which gouges coated concrete or epoxy.
- Wipe with a microfiber cloth, adding isopropyl alcohol only after testing it on a hidden section of the floor coating.
Pro Tip: Keep a small stack of pre-cut patch strips near the dispenser box. If a corner starts lifting mid-shift, you can reseal it in under a minute instead of waiting for a full changeout.
If a section won’t release without tearing or leaves a heavy adhesive film behind even after a proper 90° pull, stop and call your supplier. That’s usually a sign the wrong grade was specified for your bake temperature, not a technique problem you can solve with more elbow grease.
Prepping Floors and Applying Film So It Stays Put
Peeling problems get solved before the film ever touches the floor, not after. Three checks take less than ten minutes and prevent most of the headaches covered above:
- Confirm the coating or sealer underneath is fully cured, not just dry to the touch.
- Run a moisture check on the substrate, especially on new concrete or after a wash-down.
- Clear all dust, grit, and overspray residue, then let the room reach a stable temperature before rolling out film.
Application technique matters just as much as prep. Roll the film in one consistent direction, smoothing outward from the center to push out air rather than trapping it under the sheet. Overlap seams, according to the manufacturer’s spec, usually a few inches, and seal every edge so lifted corners don’t propagate across a whole panel. A dedicated edge-sealing routine at the perimeter and around equipment legs stops the majority of early failures before they start.
Daily spot checks catch small lifts while they’re still a two-minute patch job instead of a re-lay. Facilities that build resealing into a daily walk-through routine spend far less time on emergency rework during busy production weeks.
Specification should match your booth’s actual conditions, not a generic catalog listing:
| Booth Condition | What to Specify |
|---|---|
| High-heat bake cycles | Higher heat-resistance rating, tested to your peak temperature |
| Heavy foot and cart traffic | Thicker gauge, stronger initial tack |
| Long dwell before replacement | Adhesive rated for extended dwell without residue |
| Humidity swings | Sample-tested adhesion, not catalog default |
Order samples and test them on your own substrate under your own bake cycle before committing to a bulk order. Testing on the exact booth floor under representative temperature and humidity cycles, including simulated foot traffic, is the single most reliable way to know how a film will actually perform once it’s down.
Diagnosing and Fixing Common Floor Film Problems
Matching the symptom to the fix saves you from tearing out a whole panel when a patch would do:
- Edge lift: Press the loose corner back down, clean any dust underneath, and apply a small patch strip over the seam rather than resealing the whole edge blind.
- Bubbles or air pockets: Cut a small slit to release trapped air, smooth the film back down, and avoid rolling equipment over that spot until it’s stable.
- Tearing during peel: Slow down immediately. If the film just came out of a hot bake cycle, let it cool for a while before continuing, and pull in smaller strips rather than one long sheet.
- Residue after removal: Start with a soft sweep, then a damp microfiber cloth. If the coating underneath tolerates it, a mild cleaner handles most leftover adhesive; save stronger solvents for a hidden test spot first.
Sun exposure near loading doors and unshielded UV through skylights degrade adhesive faster than most crews expect, softening the bond well before the film’s rated dwell time is up. If a section near a window or bay door keeps failing while the rest of the floor holds fine, that’s usually the reason. When cleaning and patching stop working and the same spot keeps failing, that’s your signal to call the supplier rather than keep troubleshooting on-site. Repeated failure in the same location almost always points to a spec mismatch, not a bad batch.
A Manufacturer’s View on Preventing Floor Film Failures
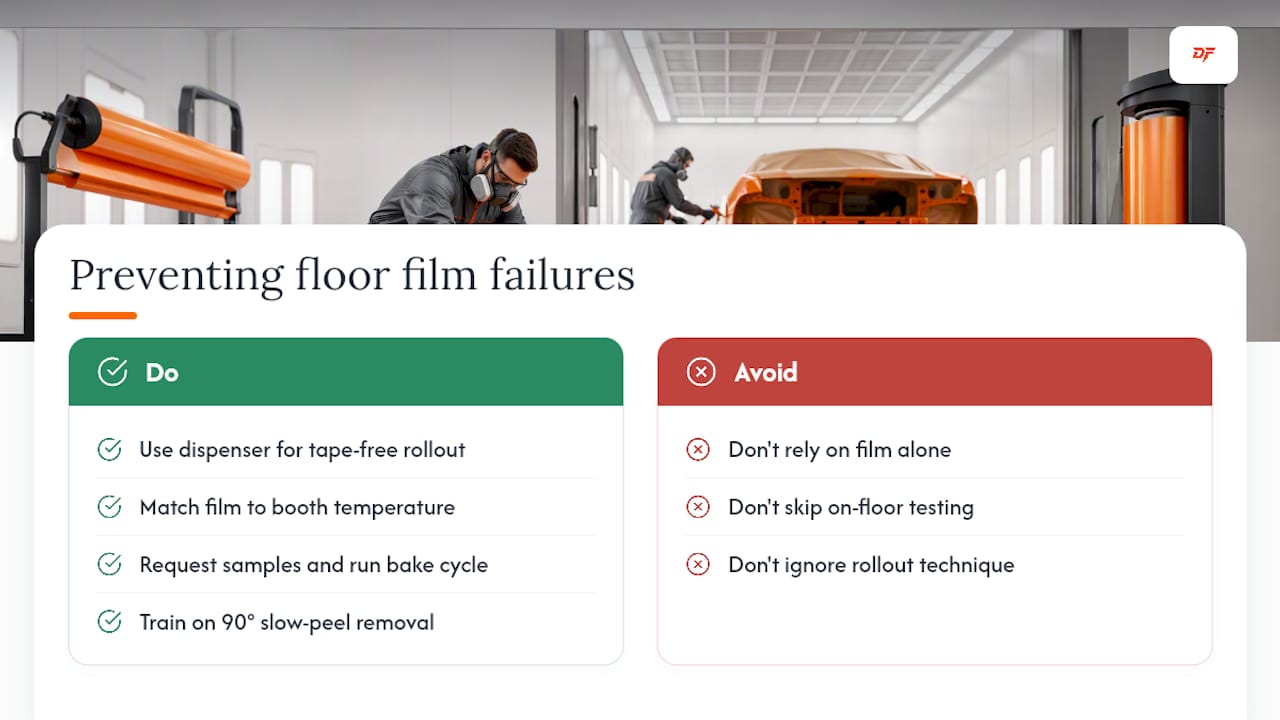
Most peeling complaints Dust Free Film hears trace back to two things: handling errors during installation and a film spec that didn’t match the booth’s real conditions. A patented dispenser box can help by allowing one installer to steady it with a foot and roll a straight, tape-free line without wrinkles or trapped air, while the multi-layer design lets the operator expose a fresh surface without tearing down the whole system.
The second problem, spec mismatch, is why some Floor Protectors are built to resist operating temperatures up to 80°C and offer both electrostatic and tacky surface options depending on how much particle capture a booth needs. Neither fixes a bad rollout on its own. Request samples, run them on your actual floor through a real bake cycle, and train whoever handles removal on the 90° slow-peel protocol before you scale up. The film can only do half the job.
— Pavlos - Angelos Filippakis
Get Floor Protector Samples and Bulk Pricing
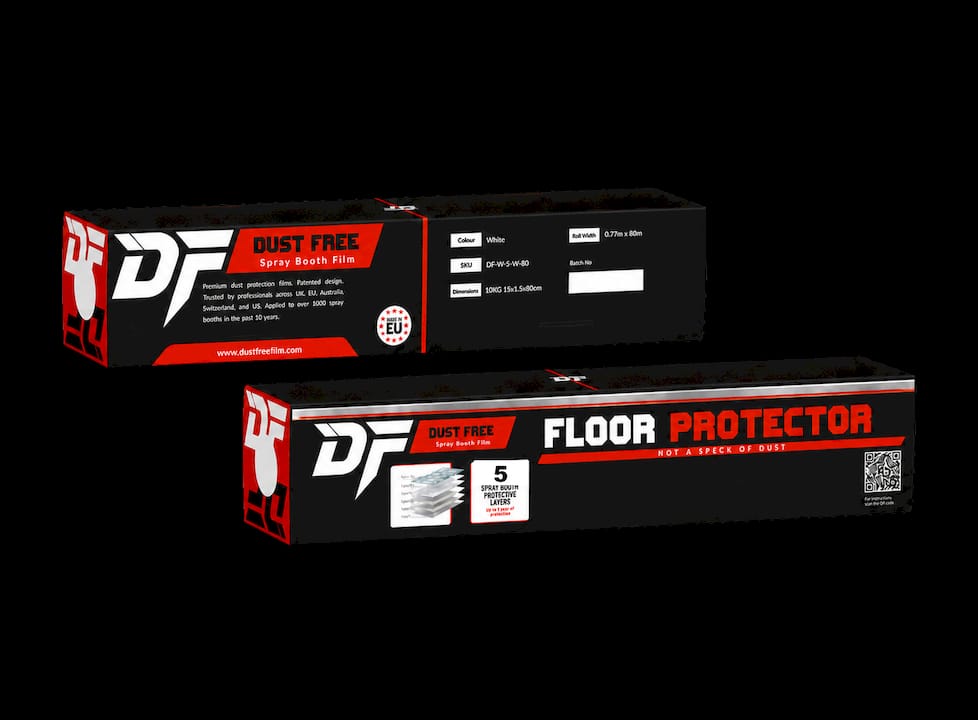
Certain multiple-layer spray booth floor protectors are designed as heavy-duty, slip-resistant surfaces that peel layer by layer without reinstalling the whole system, dispensed through a patented box enabling straight and tape-free installation. Some are rated for operating temperatures up to 80°C, which is useful for booths with frequent high-heat bakes.
Testing on your own substrate isn’t a formality, it’s the step that catches spec mismatches before you’re stuck with a pallet of film that peels wrong for your booth. Request samples, run them through a bake cycle on your actual floor, and see how the film handles your specific traffic and temperature before committing to volume. Visit the Floor Protector product page to request samples, ask about custom configurations, or get bulk pricing for your facility. If your booth walls need matching protection, the Wall Protector covers that side of the room with the same peelable, layered system.
Sources
- How to Lay and Remove Floor Protection Film Indoors
- Protective film problems and solutions: Residue, lifting, bubbles & tearing
- Acrylic protective film: Shipping & display floor life
FAQ
Why Does Floor Film Peel Up at the Edges First?
Edges take the most mechanical stress from foot traffic, carts, and equipment legs, so any weak spot in the adhesive bond shows up there before it shows anywhere else. Poor edge sealing during application or contamination at the perimeter during install are the two most common root causes.
What’s the Best Angle to Peel Protective Floor Film?
Peel at 90° with slow, steady pressure rather than folding the film flat back on itself. A 90° pull concentrates force at the bond line and reduces adhesive smear and tearing compared to a shallow-angle flat pull.
How Do I Remove Sticky Residue Left After Peeling Floor Film?
Sweep loose debris first, then wipe with a damp microfiber cloth and a mild cleaner if it’s safe for your floor coating. Escalate to a supplier-recommended solvent only after testing it on an inconspicuous area to avoid damaging the finish underneath.
Should I Test Floor Film Samples Before Ordering in Bulk?
Yes. Booth-specific variables like temperature, humidity, and surface finish change how a film performs, so testing samples on your actual floor under real bake cycles before a bulk order is standard practice, and it’s what Dust Free Film recommends to every customer.
Does Dust Free Film’s Floor Protector Cost More Than Standard Film?
Pricing depends on volume, configuration, and shipping destination, so current pricing is available directly through the Floor Protector product page rather than a fixed published rate.